Cold Frame Gardening Secrets for All Winter Harvests
Cold frame gardening is one of the easiest ways to stretch your growing season without investing in a full greenhouse. With a simple, sun-warmed box and a clear lid, you can protect tender seedlings, harden off transplants, and harvest greens well into winter in many U.S. climates. This guide explains how cold frames work, what to grow, how to build or buy one, and how to manage temperature, moisture, and pests for reliable results.
Quick answer: A cold frame is a low, bottomless box with a transparent top that traps solar heat and shields plants from wind and frost. Use it to start cool-season crops earlier, harden off seedlings, overwinter perennials, and harvest hardy greens through cold weather. Manage ventilation daily to avoid overheating and use simple insulation when temps plunge.
- Cold Frame Gardening at a Glance (Quick-Reference)
- What Is a Cold Frame and How Does It Work?
- Why Choose Cold Frame Gardening?
- Best Location and Orientation
- Cold Frame vs. Hot Bed vs. Low Tunnel vs. Greenhouse
- What to Grow in a Cold Frame
- When to Plant: Timing by Season and Region
- Building a Cold Frame: Materials, Size, and Design
- Buying a Cold Frame: Features to Look For
- Temperature, Ventilation, and Moisture Management
- Soil, Fertility, and Spacing in a Cold Frame
- Planting and Using Your Cold Frame: Step-by-Step
- Harden Off Seedlings in a Cold Frame
- Winterizing and Extra-Cold Strategies
- Common Problems and How to Fix Them
- Pest and Disease Considerations
- Success by Season: Example Schedules
- Turning a Cold Frame into a Hot Bed
- Maintenance and Longevity
- Cold Frame Crop Planning Table
- Cold Frame Gardening for Small Spaces and Containers
- Sustainability and Budget Tips
- Frequently Asked Questions
- Conclusion
Cold Frame Gardening at a Glance (Quick-Reference)
| Factor | Cold Frame Recommendation | Why It Matters |
|---|---|---|
| Sunlight | Full sun, south-facing if possible | Maximizes winter heat and light capture |
| Soil/Growing Medium | Well-draining soil or raised-bed mix | Prevents waterlogging in cool conditions |
| Ideal Use | Season extension, seed starting, hardening off, winter greens | Protects plants from frost and wind |
| Temperature Range | Keep interior roughly 40–70°F for cool-season crops | Reduces cold injury and heat stress |
| Ventilation | Crack lid on sunny days; open fully if >60°F outdoors | Prevents overheating and damping-off |
| Watering | Less frequent than open beds; water when top 1–2″ are dry | Closed frames reduce evaporation |
| Winter Insulation | Straw/leaves around sides; frost cloth inside on very cold nights | Keeps soil/air warmer during cold snaps |
| Best Crops | Lettuce, spinach, kale, Asian greens, radishes, carrots, scallions, cilantro | Cold-hardy, short-season, and cut-and-come-again |
| Frame Size | Common: 2×4 to 4×8 ft; height 8–16″ | Low profile traps heat and resists wind |
| Cover Materials | Clear polycarbonate, old window sash, greenhouse plastic | Good light transmission and durability |
What Is a Cold Frame and How Does It Work?
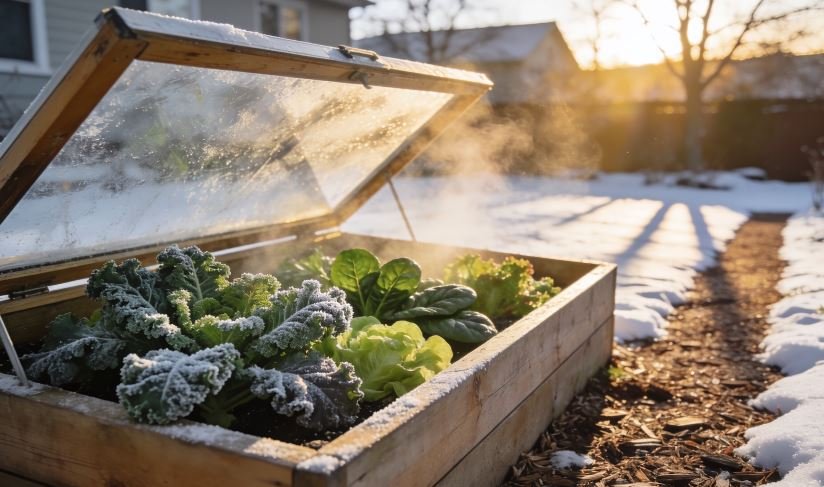
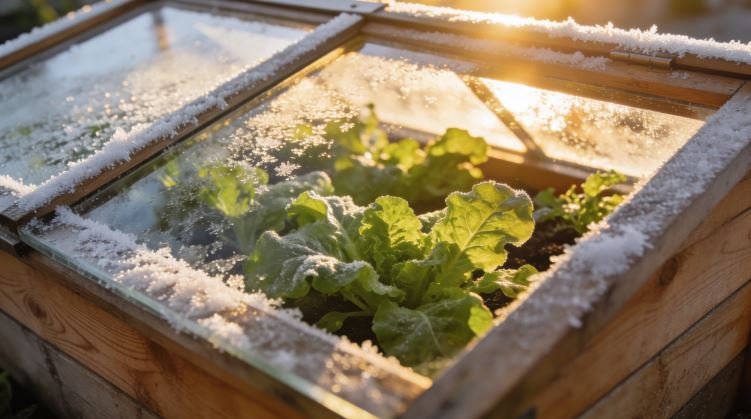
A cold frame is a bottomless, insulated box with a transparent lid (called a sash) that acts like a mini greenhouse. Sunlight enters through the clear top, warms the soil and air inside, and traps heat—especially helpful on chilly days and cold nights. Because cold frames sit close to the ground, they’re more stable in wind and heat up faster than tall structures. They don’t have active heating; instead, you rely on solar gain and simple insulation to buffer temperature swings.
Think of a cold frame as the “front porch” of a greenhouse: it’s perfect for transitioning plants between indoor protection and the open garden, and for raising tough, cool-weather crops when the rest of the yard is dormant.
Why Choose Cold Frame Gardening?
- Extend the season: Sow earlier in spring and harvest later into fall (and even winter) in many climates.
- Harden off transplants safely: Acclimate seedlings to outdoor conditions without windburn or sun scorch.
- Protect from frost and wind: Short, sturdy walls reduce stress that slows growth.
- Grow winter greens: Enjoy fresh lettuce, spinach, and herbs when store prices climb and quality drops.
- Low cost and simple: Build one from scrap windows or buy a ready-made unit; no electricity required.
- Space efficient: Fits neatly over beds, in side yards, or even on patios.
Best Location and Orientation
Pick a sunny, well-drained spot. In winter, low sun angles make location matter more than you might expect.
- Sun exposure: Aim for full sun—at least 6 hours daily. On short winter days, more is better.
- Orientation: Place the tall side north and the low, opening side south so the lid slopes toward the sun, sheds rain/snow, and avoids shading the plants.
- Wind shelter: Position near a fence or hedge for windbreak, but avoid shade.
- Drainage: Slightly elevate the frame or add gravel under the perimeter if your site puddles.
- Access: You’ll open and close the lid frequently. Place it where you can reach and monitor daily.
Important: In snow-prone regions, keep the lid slope steep enough to shed snow and consider a prop or interior brace to support weight.
Cold Frame vs. Hot Bed vs. Low Tunnel vs. Greenhouse
| Structure | Heat Source | Typical Height | Pros | Cons |
|---|---|---|---|---|
| Cold Frame | Solar only | 8–16″ | Low-cost, simple, great for hardening and greens | Manual venting; limited headroom |
| Hot Bed | Solar + soil heat (compost/manure or electric) | 8–16″ | Warmer soil for earlier spring starts | Setup complexity; monitoring needed |
| Low Tunnel (Row Cover) | Solar only | 18–36″+ | Inexpensive, covers long rows | Less sturdy, wind-prone, venting less precise |
| Greenhouse/Hoophouse | Solar; sometimes supplemental heat | 6–10’+ | Large capacity, walk-in convenience | Higher cost, permits/foundation sometimes needed |
What to Grow in a Cold Frame
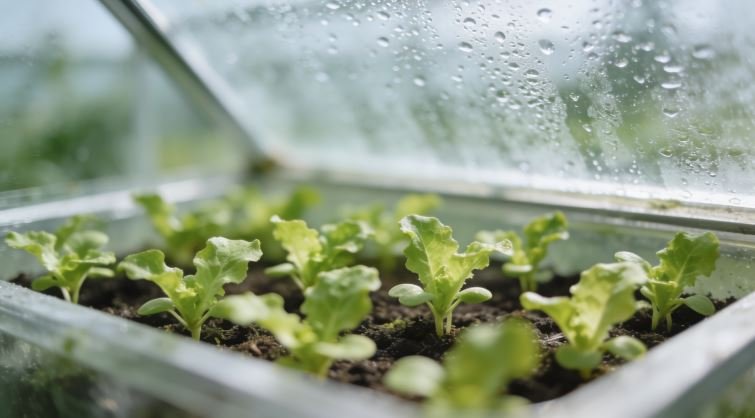
Cold frames excel with cool-season and cold-hardy crops. Many leafy greens tolerate light frosts and even freezing temperatures when protected from wind and warmed by daytime sun.
Top Cool-Season Winners
- Leafy greens: Lettuce (especially looseleaf and romaine), spinach, arugula, mache (corn salad), endive, escarole, mustard greens, and Asian greens like bok choy, tatsoi, mizuna.
- Roots: Radishes, baby turnips, carrots (especially short types), and beets for both greens and small bulbs.
- Alliums and herbs: Scallions, chives, garlic greens, cilantro, parsley.
- Brassicas: Kale, collards, and small cabbages (transplants often fit better than full heads).
Crops That Are Less Ideal
- Warm-season crops: Tomatoes, peppers, cucumbers, and basil need higher sustained heat and light; a cold frame may be too cool and low-light outside mid/late spring.
- Tall, vining plants: Limited headroom becomes a problem.
Succession Planting Ideas
- Late summer: Sow spinach and lettuce for fall harvests and winter holding.
- Early fall: Plant scallions and cilantro to overwinter where winters are moderate.
- Late winter: Start early greens 4–8 weeks before last frost. Add radishes for a quick win.
- Spring: Use the frame to harden off transplants like broccoli, cabbage, and lettuce.
Gardening tip: Choose varieties labeled “cold-hardy,” “winter,” or “overwintering.” Baby-leaf harvest types often perform especially well in frames.
When to Plant: Timing by Season and Region
Planting time depends on your USDA hardiness zone and first/last frost dates. Cold frames typically allow sowing 2–6 weeks earlier in spring and extend harvests 2–8+ weeks into fall. In milder coastal or Southern climates, you can often overwinter greens with minimal extra protection.
- Spring (most zones 5–7): Start spinach, lettuce, and radishes 4–6 weeks before your last frost. Transplant brassicas 2–4 weeks before last frost under the frame.
- Fall (zones 5–7): Plant lettuces and spinach 6–10 weeks before first frost for fall harvest. Later sowings can size up enough to “hold” under protection for winter picking.
- Zones 8–9: Sow cool-season greens in fall and winter for continuous harvest; ventilate more aggressively on warm days.
- Colder zones 3–4: Expect shorter windows. Use extra insulation, lower lid profiles, and consider double covering with interior frost cloth in deep winter.
Important: Day length affects growth as much as temperature. When days drop below about 10 hours of light (typically mid-November to late January depending on latitude), plants grow slowly. Use this to your advantage—plant early enough that crops are nearly harvest size before the “Persephone period.”
Building a Cold Frame: Materials, Size, and Design
You can build a simple, durable cold frame in an afternoon.
Recommended Size and Dimensions
- Common footprint: 2×4 to 4×8 feet. Keep it narrow enough to reach the center from the sides.
- Height: 8–12 inches high on the south side and 12–18 inches on the north side for a sloped lid.
- Lid angle: A slope of about 10–20 degrees sheds rain/snow and improves winter sun capture.
Materials
- Frame walls: Rot-resistant lumber (cedar), pressure-treated lumber rated safe for garden use, or recycled composite boards. Bricks or concrete blocks also work for permanent frames.
- Transparent lid: Old window sash (ensure lead-safe paint if vintage), polycarbonate twinwall panels (durable, insulated), or greenhouse-grade poly film over a wood or PVC frame.
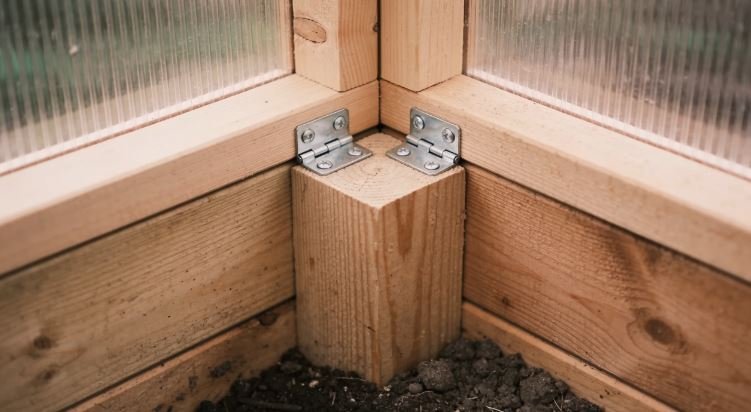
- Hinges and hardware: Sturdy hinges for the lid, weather-resistant screws, latches to secure in wind, and a prop stick or adjustable arms for venting.
- Insulation (optional): Foam board along outside walls, straw bales around the perimeter, or soil berming.
Simple Build Steps
- Measure and mark: Choose your footprint and mark the area. Level the soil. Add weed barrier and a gravel base if drainage is poor.
- Assemble walls: Cut boards to length. Build a rectangular frame with the back wall 4–6 inches taller than the front for slope.
- Attach hinges: Mount the lid to the tall north wall with hinges. Ensure the lid overhangs slightly to shed water.
- Add bracing: Reinforce corners; install a prop or adjustable vent arms.
- Seal drafts (optional): Add weatherstripping along lid edges for better heat retention in winter.
- Fill and plant: Place over an existing bed or fill with a well-draining raised-bed mix. Plant per crop recommendations.
Safety note: If repurposing old windows, test or assume presence of lead-based paint and encapsulate or sand with proper protection, or choose a safer lid material.
Buying a Cold Frame: Features to Look For
- Cover: UV-resistant twinwall polycarbonate balances light transmission with insulation and durability.
- Sturdy hinges and stays: Look for adjustable vent arms or auto-vent openers that lift the lid when it gets warm.
- Weather resistance: Aluminum or galvanized frames resist rot; wooden frames insulate better and are easy to repair.
- Size and access: Ensure you can reach all corners; consider divided lids for larger frames.
- Snow load: If you expect heavy snow, prioritize strong lids and frames with internal braces.
Temperature, Ventilation, and Moisture Management
Cold frames can overheat quickly on sunny days—even in winter. Proper venting separates thriving greens from wilted, disease-prone plants.
Ventilation Basics
- Crack the lid on sunny days when outdoor temps exceed about 40–45°F, especially if wind is calm.
- Open wider or fully if the interior exceeds about 70°F for cool-season crops.
- Close before dusk to trap daytime warmth for the night.
- Use props or automatic vents for consistent airflow when you’re away.
Temperature Targets
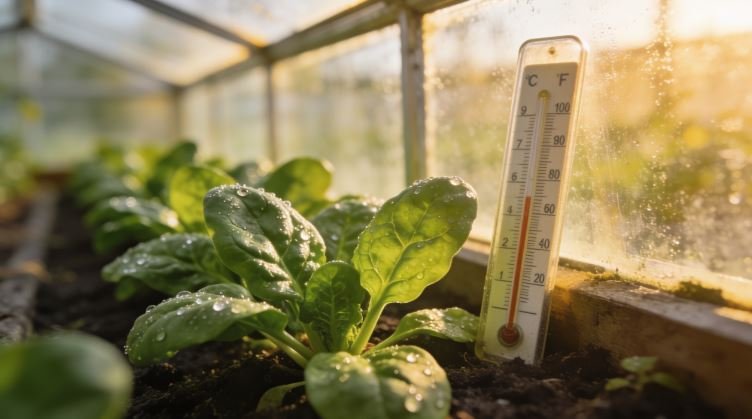
- Germination: Most cool crops sprout best at 45–70°F soil temps. Use a soil thermometer to check.
- Growth: Aim for interior air temps of roughly 40–70°F for cool-season greens; brief dips slightly below freezing are often tolerated if plants are hardened and dry.
- Extreme cold: Add a layer of floating row cover over plants inside the frame on single-digit nights or during Arctic blasts.
Watering
- Check less often: Enclosed air reduces evaporation. Water when the top 1–2 inches are dry.
- Water mid-morning: Leaves dry before night, lowering disease risk.
- Avoid soggy soil: Overwatering plus cool temps can lead to root rot and damping-off.
Gardening tip: A max-min thermometer or wireless sensor inside the frame helps you learn how your setup behaves and fine-tune venting.
Soil, Fertility, and Spacing in a Cold Frame
Because cold frames are semi-enclosed, soil conditions stay cooler and wetter longer. Choose a mix that drains well but holds enough moisture for steady growth.
- Soil mix: In-ground soil improved with compost works well. For raised frames, use a high-quality raised-bed or vegetable mix plus 10–25% finished compost. Avoid heavy clay and pure potting mix designed for containers only.
- Fertility: Leafy greens appreciate modest nitrogen. Mix in compost before planting; side-dress with a balanced organic fertilizer as needed. Avoid heavy feeding in mid-winter when growth slows.
- Spacing: For baby leaf harvest, sow thickly and cut young. For heads, follow packet spacing but allow a bit more air circulation in winter to reduce disease. Example: leaf lettuce 4–8 inches, spinach 3–6 inches, radishes 1–2 inches apart.
Planting and Using Your Cold Frame: Step-by-Step
1) Prepare the Site and Frame
- Level and drain: Ensure the base is level and drains well. Add gravel if needed.
- Amend soil: Mix in compost and rake smooth.
- Install the frame: Anchor if your site is windy.
2) Sow or Transplant
- Direct sow: Make shallow furrows (¼–½ inch deep) for greens and radishes; ½ inch for carrots/beets. Sow a bit thicker than outdoor recommendations thin later.
- Transplant: Set out sturdy starts of lettuce, kale, or Asian greens slightly deeper than in cell packs to anchor against cool drafts.
- Label and map: Winter beds fill fast; keep track of varieties and sowing dates.
3) Water and Cover
- Water in: Gently settle seeds and roots with a fine spray. Avoid puddling.
- Close the lid: Secure against wind and monitor temps closely during the first sunny stretch.
4) Vent and Thin
- Vent daily: Crack the lid on sunny mornings; adjust by midday; close before evening.
- Thin seedlings: Snip extras to recommended spacing for strong growth and fewer disease problems.
5) Protect on Cold Nights
- Add inner cover: Drape floating row cover or an old bedsheet over plants on very cold nights; remove or vent in the morning.
- Insulate sides: Use straw bales or leaves around the exterior to reduce heat loss.
6) Harvest and Replant
- Cut and come again: Harvest outer leaves first; leave the growing center intact for repeat pickings.
- Succession: After harvesting a row of radishes, re-sow immediately to keep production steady.
Harden Off Seedlings in a Cold Frame
Cold frames are superb for hardening off, the 7–10 day process that acclimates indoor-grown seedlings to outdoor conditions.
- Days 1–2: Keep the lid mostly closed; open slightly for 1–2 hours midday. Avoid cold wind.
- Days 3–5: Increase venting time; allow more direct sun. Monitor moisture closely.
- Days 6–7: Leave lid open all day if weather is mild; close at night.
- Days 8–10: Keep open day and night if forecast is frost-free; then transplant to the garden.
Note: Tender warm-season crops like tomatoes and peppers need frost-free nights. Use the cold frame for daytime conditioning in early spring, then bring them in at night until nights warm.
Winterizing and Extra-Cold Strategies
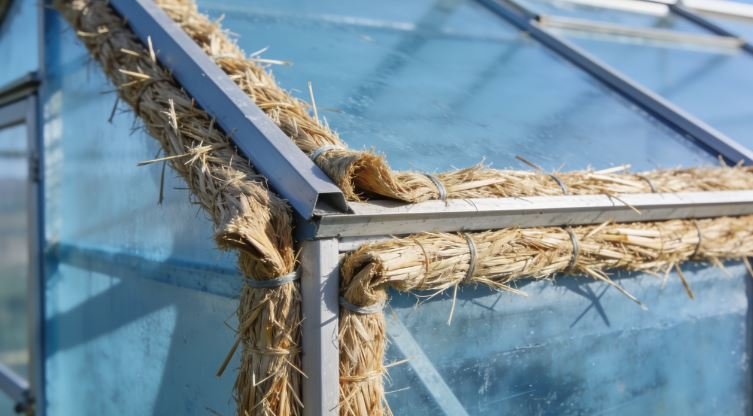
- Double coverage: Add an internal floating row cover under the lid for a few degrees of extra protection.
- Thermal mass: Place dark water jugs filled with water inside to store daytime heat and release it at night.
- Mulch: Use straw or shredded leaves around mature plants to buffer soil temps.
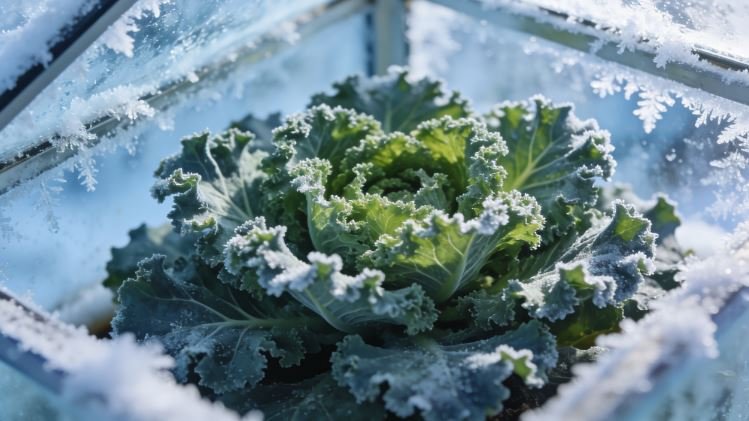
- Snow as insulation: A light snow layer around the outside can insulate, but clear heavy snow from the lid to prevent damage.
- Emergency cold: In severe cold snaps, lay old blankets over the lid at night; remove in the morning to restore light.
Common Problems and How to Fix Them
| Symptom | Possible Cause | What to Check | Action |
|---|---|---|---|
| Wilting on sunny winter days | Overheating or root-bound dryness | Interior temp; soil moisture | Vent earlier and wider; water in the morning as needed |
| Yellowing, slow growth | Low nitrogen or low light | Soil fertility; winter sun hours | Side-dress lightly; thin plants; maximize sun exposure |
| Mold/algae on soil | Poor airflow, overwatering | Condensation; lid venting; soil moisture | Increase venting; water less often; thin seedlings |
| Damping-off (seedlings topple) | Fungal disease from wet, cool soil | Watering frequency; sowing density | Improve drainage; bottom water; sow thinner; sanitize tools |
| Frost damage tips | Rapid temp drop, poor insulation | Night lows; lid seal; inner cover | Add row cover inside; insulate sides; close earlier |
| Pest nibbling | Slugs, rodents, aphids | Slime trails; droppings; leaf curl | Hand-pick slugs; use traps; seal gaps; wash off aphids; encourage ladybugs |
Pest and Disease Considerations
- Slugs/snails: Love cool, damp spaces. Hand-pick, use iron phosphate baits as labeled, or set shallow beer traps. Keep the interior tidy and avoid overwatering.
- Aphids: Rinse with a firm spray of water. Ventilate well to avoid heat-stressed, tender growth that attracts aphids.
- Rodents: Mice or voles can slip through gaps. Staple hardware cloth to the base and ensure tight lid closures.
- Fungal diseases: Reduce humidity with earlier venting, proper spacing, and morning watering.
Success by Season: Example Schedules
Early Spring (Zones 5–7)
- Late February–March: Direct sow spinach, mache, and radishes in the frame.
- Mid–late March: Transplant lettuce starts; keep lid mostly closed at night, vent midday.
- April: Harvest baby greens; re-sow radishes; start hardening off brassica transplants.
Fall into Winter (Zones 5–7)
- Late August–September: Sow spinach, lettuce, and scallions. Aim to size plants up before day length drops.
- October: Add straw around exterior; begin using inner row cover on frosty nights.
- November–December: Harvest outer leaves sparingly; growth slows but stays fresh under protection.
Winter (Zones 8–9)
- November–February: Continuous sowings of lettuce, arugula, and cilantro. Vent generously on warm afternoons to prevent bolting.
Turning a Cold Frame into a Hot Bed
For even earlier spring harvests, convert your cold frame into a hot bed by adding a gentle heat source that warms the soil.
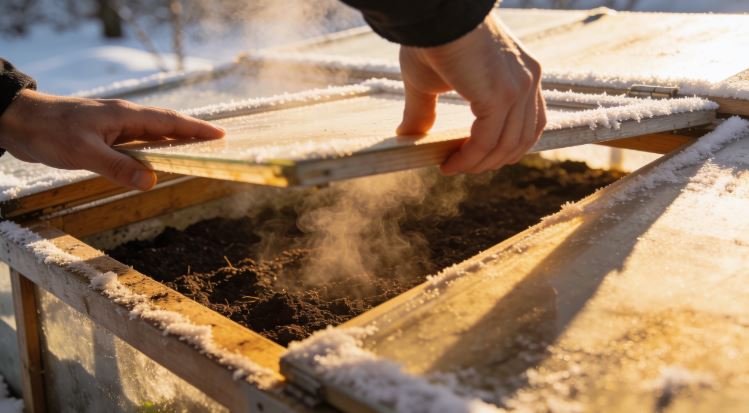
- Biological heat: Bury an 8–12 inch layer of fresh, actively decomposing manure or a hot compost mix beneath 6–8 inches of soil. This can raise soil temps for several weeks. Monitor with a soil thermometer to avoid overheating seedlings.
- Electric soil cables/mats: Outdoor-rated heating cables installed per manufacturer directions can boost soil temps during cold spells. Use a thermostat to maintain safe ranges.
Note: Biological hot beds require planning and frequent temperature checks. Compost heat declines over time; sow accordingly.
Maintenance and Longevity
- Seasonal cleaning: Wash lids each season for better light. Clear algae and soil splash.
- Hardware checks: Tighten hinges, replace cracked lids, and oil moving parts as needed.
- Wood care: Treat exterior with garden-safe finishes or use rot-resistant lumber.
- Rodent-proofing: Inspect for gaps, especially in fall.
Cold Frame Crop Planning Table
| Crop | When to Sow/Transplant | Spacing | Target Temp Range | Notes |
|---|---|---|---|---|
| Lettuce (leaf/romaine) | 4–8 weeks before last frost; 6–10 weeks before first frost | 4–8″ apart | 40–70°F | Harvest outer leaves or cut baby leaves |
| Spinach | 6–8 weeks before/after frost dates | 3–6″ apart | 35–65°F | Very cold-tolerant; protect from deep freezes |
| Radish | 4–6 weeks before last frost; in fall for quick crop | 1–2″ apart | 40–70°F | Fast; re-sow every 2–3 weeks |
| Carrot (short types) | 4–6 weeks before last frost; late summer for fall | Thin to 1–2″ | 45–75°F soil | Keep surface moist until germination |
| Cilantro | Early spring and fall | 4–6″ apart | 40–70°F | Bolts in heat; loves cool frames |
| Kale (baby or small plants) | Transplant early spring/fall | 8–12″ apart | 35–70°F | Harvest baby leaves for tender salads |
| Scallions | Early spring and fall | 2–3″ apart | 40–70°F | Can clump; harvest as needed |
Cold Frame Gardening for Small Spaces and Containers
No in-ground bed? You can place a cold frame over a raised bed or even over large containers set side by side.
- Container depth: 6–8 inches for leafy greens; 10–12+ inches for carrots/beets.
- Soil mix: Use high-quality container or raised-bed mix with compost.
- Watering: Containers may dry faster on sunny days monitor closely.
- Mobility: Smaller frames can be moved seasonally to follow sun.
Sustainability and Budget Tips
- Repurpose materials: Old windows, storm doors, or clear skylights make excellent lids.
- Thermal mass: Reuse dark water jugs as heat sinks.
- Local lumber: Cedar offcuts or reclaimed boards reduce costs and waste.
- DIY venting: A simple notched prop stick can provide adjustable openings.
Frequently Asked Questions
How warm does a cold frame get in winter?
On sunny winter days, interior temperatures can climb well above outside air often 10–30°F warmer depending on sun, wind, and lid material. That’s why regular venting is essential. At night, heat retention depends on insulation and weather; expect temps to fall close to ambient unless you add inner covers or thermal mass.
Can I grow tomatoes or peppers in a cold frame?
Not reliably for full-season production. Cold frames are too short and generally too cool for warm-season crops, especially at night. However, you can use a frame to harden off transplants earlier or to protect early spring tomatoes on marginal nights before planting out, removing the frame once weather settles.
Do I need supplemental heat?
Most gardeners don’t. For cool-season greens, solar heat plus good insulation is enough. If you want extra-early starts, consider a hot bed setup (compost heat) or soil heating cables with a thermostat. Always monitor temperatures closely to avoid overheating roots.
How do I prevent mold and damping-off?
Vent daily on sunny days, water in the morning only when the top 1–2 inches of soil are dry, and thin seedlings for airflow. Use clean tools and avoid over-fertilizing young plants. If trouble persists, switch to bottom-watering trays inside the frame for seedlings.
Will a cold frame work in very cold climates?
Yes, with realistic expectations. In zones 3–4, a cold frame can protect hardy crops and transplants, but growth slows markedly during deep winter. Add inner row covers, insulate the exterior, and focus on harvesting from plants established before the coldest period rather than expecting rapid winter growth.
What’s the difference between clear plastic and polycarbonate panels?
Greenhouse-grade plastic film is inexpensive and flexible but less durable and insulating. Twinwall polycarbonate is rigid, more insulative, and longer-lasting, with good light diffusion that reduces leaf scorch. If you expect snow or want a long-term frame, polycarbonate is usually worth the investment.
Conclusion
Cold frame gardening is a practical, budget-friendly way to enjoy fresh harvests earlier in spring and later into fall sometimes all winter long. Choose a sunny spot, build or buy a low, well-sealed frame with a transparent lid, and focus on cool-season crops. Master daily ventilation, keep the soil well-drained and modestly fertile, and add simple insulation during cold snaps. With a little attention, your cold frame will become one of the most productive square feet in your garden.