How to Grow Pumpkins in Your Backyard: An Easy Beginner’s Guide
You’re thinking of raising pumpkins yourself? This is definitely one of the most rewarding and downright fun projects I’ve engaged in within my garden. Now, I also understand why you might be holding back on attempting to cultivate them yourself. Don’t they take up tons of space because they can grow rather large, right?
I used to think so too. However, I discovered that with just a little planning and, most crucially, selecting the right cultivar, you can definitely grow pumpkins on your own, even in the most regular of backyards.
In today’s DIY guide, I’m going to walk you through the simple process of growing the best pumpkins in your backyard. The process is simpler than you think, and the fun of reaping the harvest yourself is well worth the trouble.
- The Most Critical Step: Choosing the Right Pumpkin
- Planting Your Pumpkins: The Step-by-Step Guide
- Caring for Your Growing Pumpkin Patch
- The Small Garden Super-Hack: Growing Pumpkins Vertically
- Common Pumpkin Problems (And How to Solve Them)
- The Big Day: How to Know When Your Pumpkin Is Ready
- The Art of the Harvest (Don't Mess This Up!)
- Conclusion: That Incomparable Feeling of Autumn Gold
The Most Critical Step: Choosing the Right Pumpkin
Before you start thinking about soil, you’ve got to decide on which kind of pumpkin you’d like to cultivate. That question can determine in advance the kind of space you require and whether you’re in for an interesting harvest or something downright troublesome.
Pumpkin Personalities – The Scoop
Pumpkin vines can be divided into two major categories:
- Vining (Standard): These are the traditional, sprawling pumpkin varieties. These plants can vine out to 10, 20, or even 50 feet! These are the varieties that grow the massive “prize-winning” pumpkins. If you’ve got space in your backyard, these are great plants to have. But if you’ve only got a small space in your backyard, they can be garden bullies.
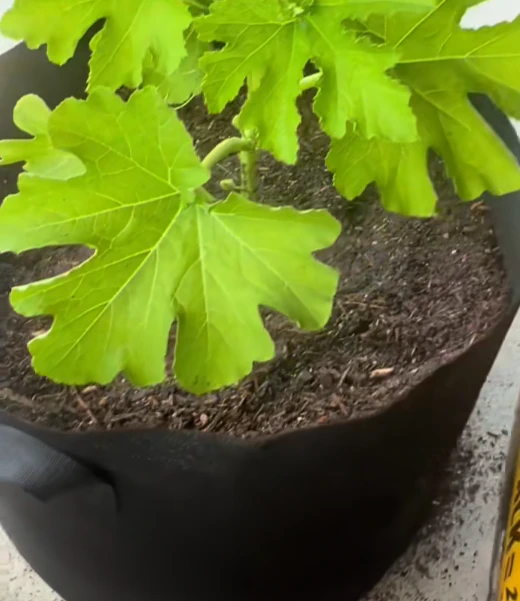
- Bush or Semi-Bush (Compact): These pumpkins are bred to be far more easily managed. They still yield full-sized pumpkins, albeit smaller in some cases, but they remain in compact form with the plant growing only to 3 to 4 feet across in terms of width.
The first year, I naively made the mistake of growing a vining “Connecticut Field” pumpkin in my small raised garden bed. This is one of those classics to Beginner Gardening Mistakes. The thing was overtaking not only my pepper plants but was making a run for the neighbor’s property by August. It was quite the comedy of errors – and that plant taught me to always check the seed packet!
My Favorite Varieties for Beginners & Small Gardens
Unless you happen to have a large backyard, I would definitely recommend beginning with these smaller varieties:

- Sugar Pie or ‘Small Sugar’: These happen to be my personal preferences. They yield lovely 6 to 8 pound pumpkins that are sweet, string less, and just perfect for pie-making. The growth is very viny but can be controlled.
- ‘Jack Be Little’ (or ‘Wee-B-Little’): These are the cute palm-sized pumpkins that you would love to see. The plant grows to be very compact, with each vine yielding tons of pumpkins that would qualify to be palm-sized.
- ‘Baby Boo’: Also similar to ‘Jack Be Little,’ but with beautiful ghostly white markings.
- ‘Bushkin’: It is bush-type, yielding the traditional 10 to 12-pound pumpkins, though they won’t hog the entire space in your garden.
Planting Your Pumpkins: The Step-by-Step Guide
Pumpkins typically can be direct-seeded in the garden from seed. They transplant poorly because they grow very rapidly and don’t take kindly to root disturbance, so spending lots of money on transplant packs, in my opinion, is unnecessary.
When to Plant for an Autumn Harvest
Pumpkins are tropical plants. Pumpkins don’t like frost either. The best time to plant pumpkin seeds would be in late spring, 1 to 2 weeks after the last frost date in your area and after the soil has warmed up a bit. That would be somewhere between late May to mid-June in most parts of the US and Europe. That would give you plenty of time to harvest them perfectly to make them ready for the fall season because pumpkins typically take 90 to 120 days to ripen.
Finding the Perfect Spot
Before you plant, find them a good home. There are two key needs for pumpkins:
- Full Sun: They are complete sun-lovers. You must provide them with full sun—in other words, at least 6 to 8 hours of direct sun per day.
- Lots of Space (Even for Bush Types!): Give them enough space to spread out. Even “bush” varieties should be planted in a 4 to 5 ft diameter spot by themselves!
The “Mini-Mound” Method for Planting
This tip was taught to me by my friend Russell, who has an extraordinary vegetable garden, by the way. Pumpkins prefer warm soil and dislike “wet feet” – roots being in standing water. The preferred method of planting pumpkins involves “pumpkin hills” or “mini-mounds.”
- In the spot you’ve chosen to be sunny, you can use the shovel to make a small mound with soil that is about 1 to 2 feet in width and 6 to 8 inches in height.
- In the middle of the heap, sow 3 to 4 pumpkin seeds about 1 inch deep.
- Water them well.
- Now, after the seedlings develop their “true leaves,” you’ll need to thin them out. This can be very difficult, but it should be done in the same manner that we thin carrots. Simply identify the two best seedlings in each clump and cut out the others at the soil line.
The mound technique allows for warm soil that drains well – essential for giving pumpkins the best start in life.
Caring for Your Growing Pumpkin Patch
For the first several months, you only need to keep the grapevines healthy and well nourished.
Watering: These Plants Are Extremely Thirsty
Think about the size of these enormous leaves and the huge fruits that they are bearing they’re composed largely of water! Pumpkins are very thirsty plants because they require plenty of moisture.
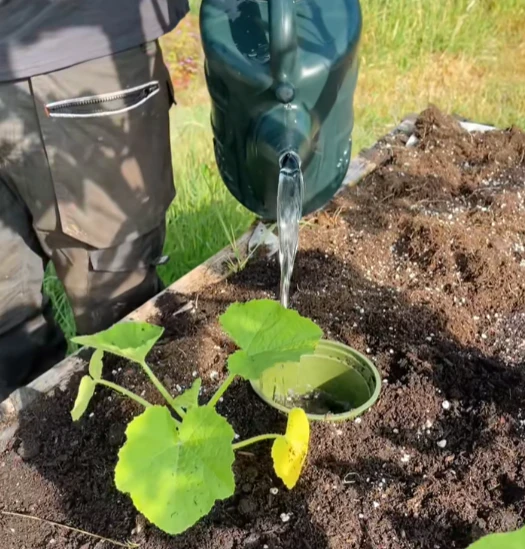
- How Much? Give them a deep soaking about 1 to 2 times each week. Sprinkling them with water daily doesn’t help because it only gives them moisture on the surface rather than deep moisture to help them grow deep roots.
- When & Where? I always water in the morning, right at the base of the plant (on the soil). Don’t wet the leaves if you can avoid it. Damp leaves in the evening invite diseases to enter.
Feeding: Pumpkins are “Heavy Feeders”
These plants consume food in large quantities. To be big and productive, they require soils that are rich in nutrients.
- Start with Great Soil: This is the most critical stage. When I’m getting ready to plant my pumpkin hills, I make sure to work plenty of compost in with them. Beginning with great soil is absolutely essential to growing great pumpkins! You can learn more in our Garden Soil Guide
- Mid-Season Treatment: I find that giving my plants a “snack” in the middle of the season, when they are beginning to ripen, works well for them. They enjoy being treated to a good balanced organic plant food or compost supplement.
The Mulch Advantage

As soon as you see that your plants are a couple inches high, I would recommend that you go ahead and mulch with a thick 2 to 3 inch layer of natural mulch such as straw or leaf fragments:
- It maintains soil moisture evenly.
- It controls weeds (a massive time-saver!).
- Above all, it gives them a clean, dry bed to rest on while they’re growing because it would otherwise cause them to rot on the wet soil.
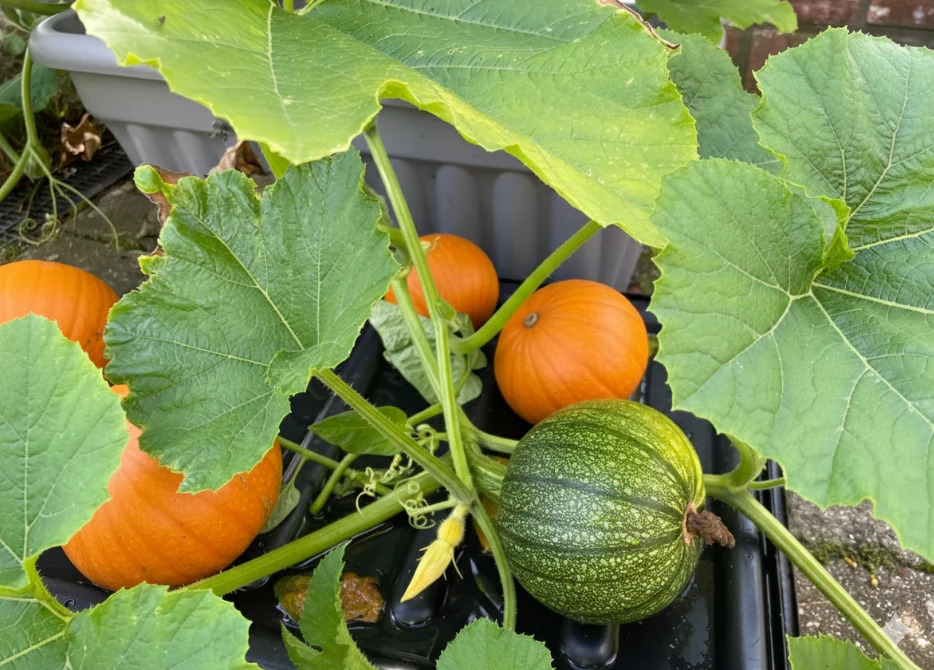
The Small Garden Super-Hack: Growing Pumpkins Vertically
This was the trick that completely revolutionized the game for me in my small garden. Yes, you can grow pumpkins in it! It saves so much space, and it can easily be done.
- What Kinds? This technique is only good for smaller pumpkins such as ‘Jack Be Little’, ‘Small Sugar’, or others that weigh less than 5 pounds. You wouldn’t want to hold up a massive one!
- What Type of Support? You require stout support. My initial attempt with makeshift wooden supports resulted in a sorry, splintered disaster. Employ either an A-frame trellis, a cattle panel suspended between raised beds or an exceptionally sturdy fence. You can discover further solutions in my Trellis Guide article.
- The “Hammock” Trick: Now comes the best part! When the pumpkins begin to appear on the vine, they’ll start to ripen, and they’ll need something to hold them in place so they won’t be knocked off the vine by their own weight. My friend Maria showed me this trick: take parts of old t-shirts, or even pairs of pantyhose, or onion bags, which come in mesh you can make little “hammocks” or “slings” for each pumpkin, and tie them to the trellis with the pumpkin nestled inside.
Common Pumpkin Problems (And How to Solve Them)
Cultivating pumpkins is relatively simple, but these are the three problems that I deal with most frequently:
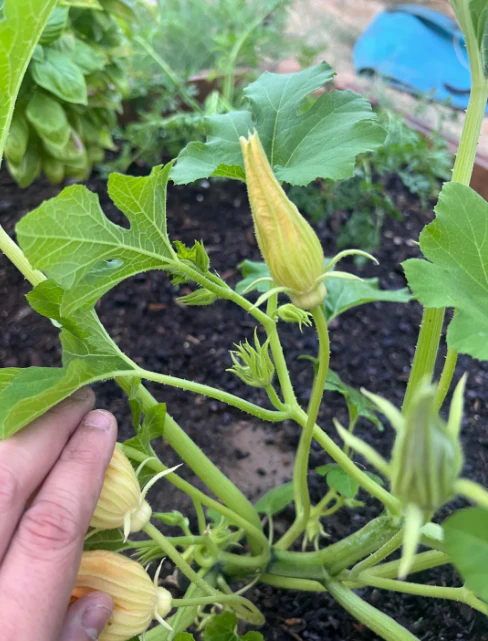
- Problem: Lots of Flowers, No Fruit!
- The Cause: This is almost always related to pollination. Pumpkin plants are either male or female. They each have different flowers, with bees acting to cross-pollinate them from the male to the female plant. Sometimes the bees fail to perform their duties.
- The Solution: “Play Cupid.” You must “hand pollinate.” You must pick out the male flower, which has a spindly stem, and the female flower, which has a baby pumpkin attached to it. You must take a Q-tip or paintbrush and dab the pollen from the stamen of the male plant and touch it to the stigma of the female plant. You feel very scientific and very smart doing it.
- Problem: My Plants are Covered in Nasty Bugs!
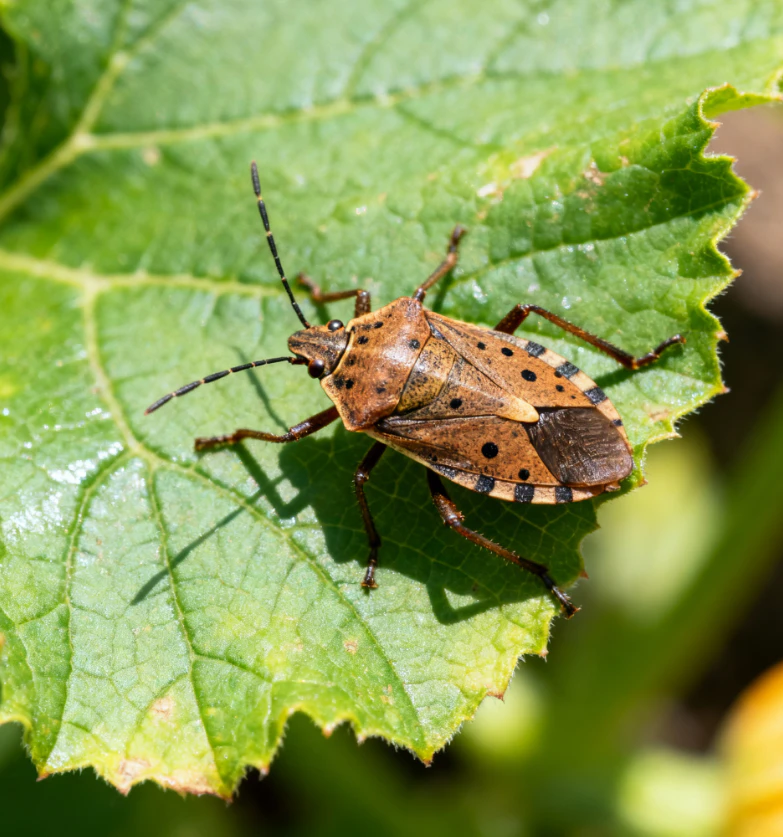
- The Culprits: The most prominent adversaries of squash are Squash Bugs (these are grayish-black beetles) and Squash Vine Borers (these are moths whose eggs are laid at the base of the plant).
- The Solution: Vigilance! This is a war you can win with attendance. Inspect your plants, particularly the undersides and where the soil meets the plant, for eggs (squash bug eggs tend to be conveniently packaged in little bundles) and live bugs. Remove them by hand and toss them in a bucket of soapy water. Or, take advantage of natural pesticides such as neem oil.
- Problem: My Leaves Have White, Powdery Stuff on Them!
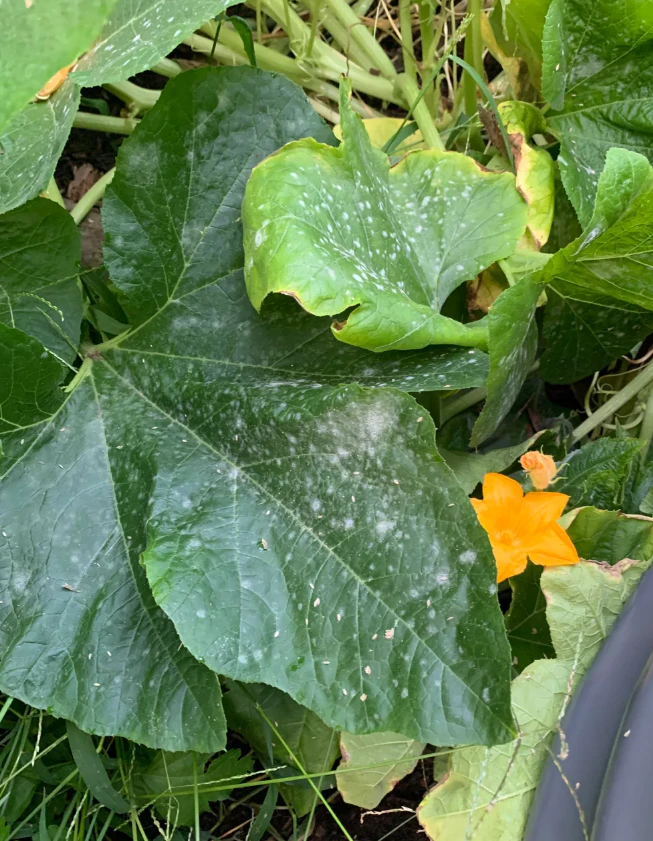
- The Cause: This is Powdery Mildew, which is another very common fungus that shows well in humid conditions with little air circulation.
- The Solution: Prevention is the key, of course. Water the soil, not the plant leaves. Give the plants sufficient room to grow. If you notice it beginning to occur, you can eliminate it with a spray solution of 1 part milk to 10 parts water, or with Neem oil fungicide spray on the plant leaves.
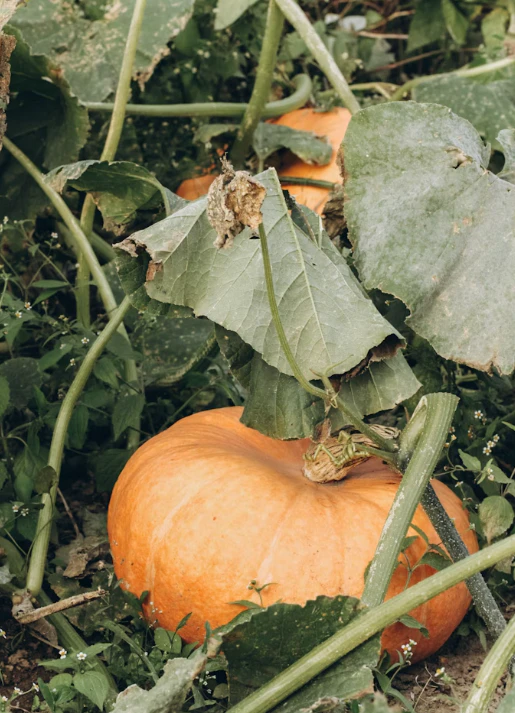
The Big Day: How to Know When Your Pumpkin Is Ready
Timing is everything in harvesting to ensure you enjoy the best flavor and longest storage life. Don’t rush it! Below is my 4-step guide on when to harvest pumpkins to perfection.
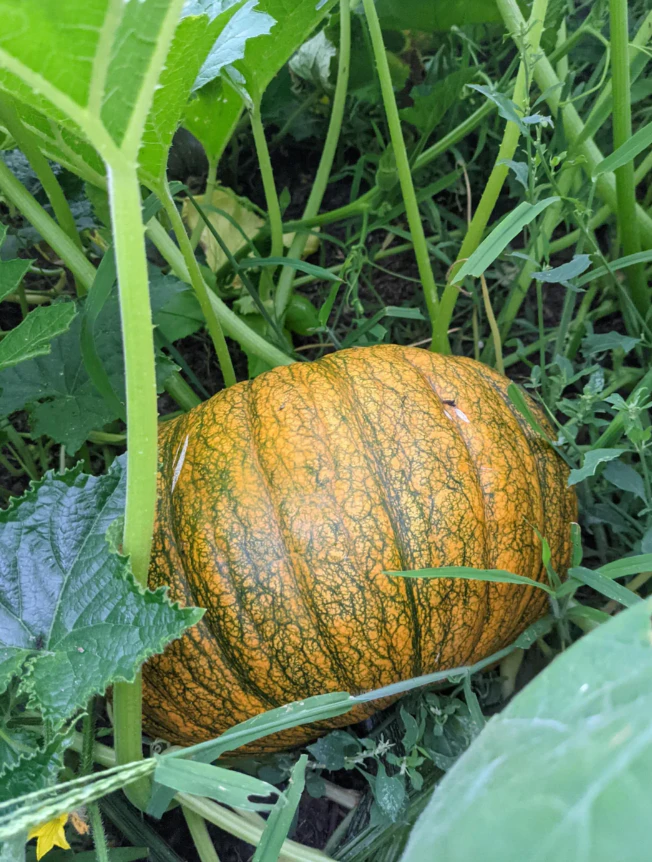
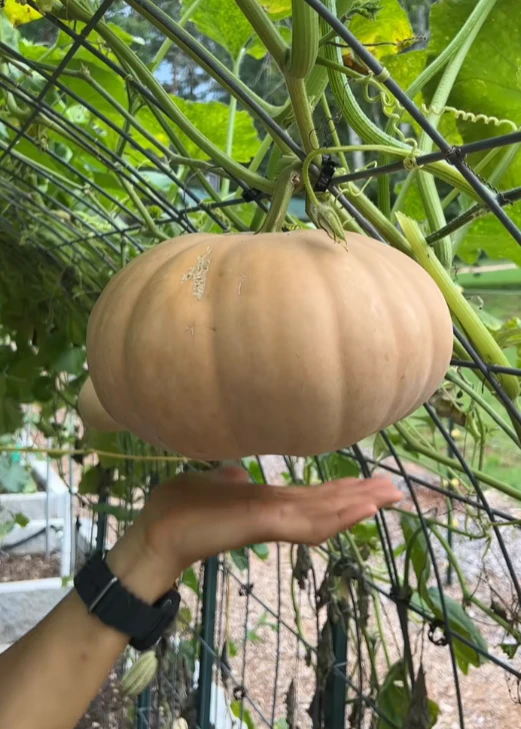
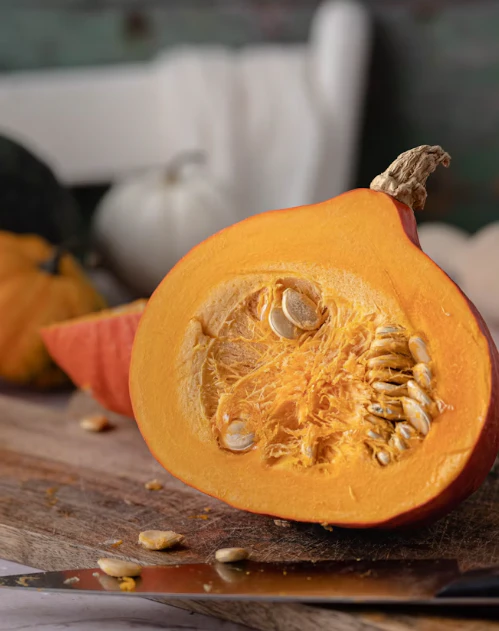
- The Color Test: The color of the pumpkin should be dark and rich, the same color it should be, such as dark orange for ‘Sugar Pie’. If it is green, it won’t ripen after it has been picked from the vine.
- The Thumbnail Test: This is the best test. You should attempt to puncture the skin on the pumpkin with the thumbnail. If it can easily be punctured with the thumbnail, it is not ripe yet. If it can barely be punctured by the nail, it is ripe.
- The Stem Check: Check the stem where it attaches to the pumpkin. The stem should be dry and hard to the touch. If it is green and pliable, the plant is still nourishing it.
- The Sound Test: My grandfather’s trick. Give the pumpkin a good whack with your fist. You can tell if it is ripe if it makes a hollow sound inside. If it takes on an amphitheatical quality, it’s not ripe yet.
The Art of the Harvest (Don’t Mess This Up!)
You’ve done all the work, and you’ve achieved perfection with your pumpkin. The final step is essential if it is to last for months to come.
- Use a Tool! Don’t simply pull or twist the pumpkin from the vine. This can cause the stem to break, leaving it open to rotting.
- Leave a “Handle”: Cut the pumpkin from the vine with either a good, sharp knife or pruners. The most crucial step is to leave 1 to 3 inches of stem, referred to as “handle,” on the pumpkin.
- The Importance of the Handle: This handle takes time to dry completely, ensuring the pumpkin is closed to avoid any kind of decay inside it. The pumpkin without the stem would easily decay in a matter of weeks, whereas with the stem, it would easily last throughout winter.
The harvested pumpkins can be “cured” to make them last even longer by letting them sit in the sun for a week after harvesting. This makes the skin even harder than before.
Conclusion: That Incomparable Feeling of Autumn Gold
There is something very special about growing pumpkins. It is such a slow process to watch the seedling grow from a seed to a vine to finally harvest the ripe fruit, which is the epitome of autumn.
The best feeling in the world is being able to take the pumpkin you grew yourself back to your own house because you raised it from seed yourself. It is more than just a vegetable it is a prize, an ornament, and the biggest highlight of the Thanksgiving dinner in terms of pie ingredients.
I hope this guide has demonstrated to you that you don’t need to own a huge farm to enjoy it because if you pick one of the smaller varieties, you can attempt it yourself next season and you would be astonished at what you can harvest yourself.