A Complete Guide to Container Gardening
Before I had a yard, my entire gardening journey began on a tiny balcony with a single terracotta pot. I quickly discovered that container gardening isn’t a compromise it’s a powerful and flexible way to create a thriving garden absolutely anywhere.
In this guide, I’ll share all my hard-won lessons and simple secrets to success with growing in pots. We’ll cover everything from choosing the right container to the perfect soil mix. Let’s create your own portable paradise!
- The Freedom of a Garden Anywhere: Why I Fell in Love with Pots
- Part 1: The Foundation – More Than Just a Pretty Pot
- Part 2: The Lifeblood of Your Container – Why Your Soil is Everything
- Part 3: What Should You Grow? My Favorite Plants for Pots
- Part 4: The Simple Steps to Planting Your Pot
- Part 5: The Daily Dance – How to Water and Feed Containers
- Conclusion: Your Own Portable Paradise
The Freedom of a Garden Anywhere: Why I Fell in Love with Pots
When I first started, I thought of pots as a limitation. I’ve since learned they are a form of freedom. For a beginner, or anyone with limited space, container gardening isn’t just an option; it’s often the best option. Here’s what I discovered:

- Your Garden Can Be Anywhere: This is the true magic. A sunny windowsill, a small apartment balcony, a front stoop, a rooftop if you have a spot that gets some sun, you can have a garden. There are no excuses!
- You Are the Master of Your Soil: My first in-ground garden struggled because my yard had heavy, clay-like soil. It was a constant battle. But with containers, you have total control. You can create the perfect, fluffy, nutrient-rich soil for any plant you want to grow, from scratch.
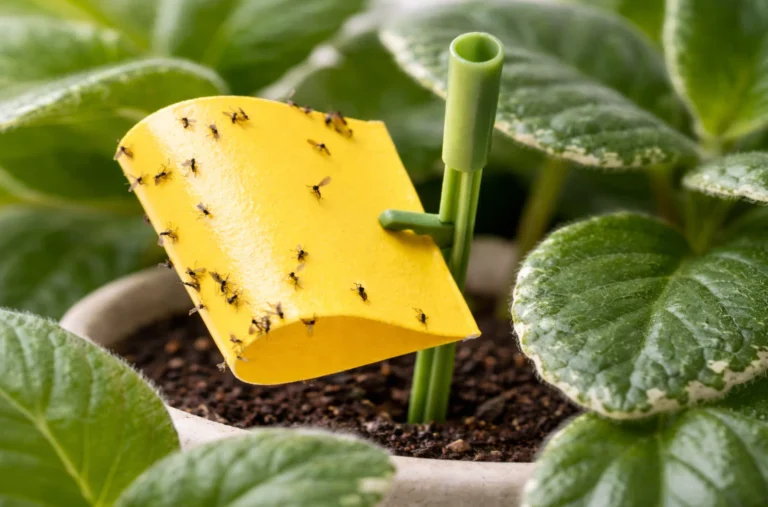
- Weeds and Pests Are Way Less of a Headache: One of the biggest joys of container gardening is the dramatic reduction in weeding. And because your plants are elevated and contained, it’s much easier to spot and deal with pests like slugs and snails before they become a major problem.
- You Can Chase the Sun: Is your balcony only sunny in the morning? No problem. You can simply move your pots to follow the light. This portability is a huge advantage that in-ground gardeners can only dream of.
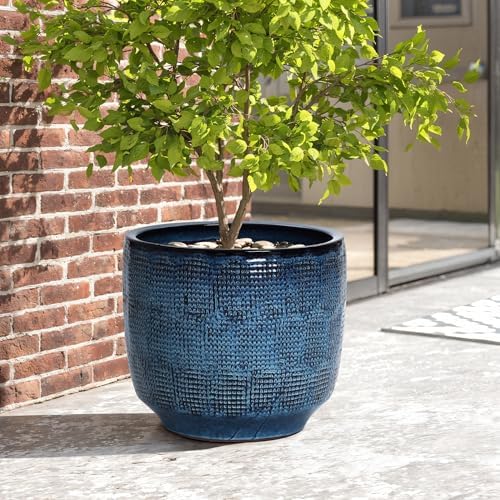
- Gradient Color Effect: Our large ceramic pots for plants outdoor designed with the subtle gradient transitions from dark…
- Lustrous Surface: The glaze finish of large plant pots has unique grid texture that is very distinctive, and its elegant…
- Quality Material: The planters for outdoor plants is meticulously handcrafted using quality ceramic material with a grad…
Part 1: The Foundation – More Than Just a Pretty Pot
Choosing a container seems simple, but the pot you choose is your plant’s entire world. Its size, material, and drainage will have a massive impact on the health of your plant.

The Mistake That Taught Me Everything: The Pot with No Hole
I’ll never forget my first lavender plant. I bought it a beautiful, glazed ceramic pot that perfectly matched my patio furniture. I planted it, watered it, and watched in horror as it slowly yellowed and died over the next few weeks. When I finally tipped it out, I discovered a swampy, rotten mess. The problem? The beautiful pot had no drainage hole. It was a death trap. This taught me the golden rule of container gardening: Drainage is everything. No matter how beautiful a pot is, if it doesn’t have holes in the bottom to let excess water escape, do not use it.
Does the Pot’s Material Really Matter?
Yes, it does! Each material has its own personality, and here’s my real-world experience with them:
- Clay / Terracotta: I love the classic, rustic look of terracotta. These pots are porous, meaning they “breathe,” which helps keep the soil from getting too soggy. This is great for plants that hate wet feet, like rosemary or succulents. The downside? They dry out very, very quickly on a hot summer day, so you’ll need to be vigilant with watering.
- Plastic: Plastic pots are lightweight, affordable, and they hold onto moisture much longer than terracotta. This makes them a great choice for thirsty plants like mint or for gardeners who might occasionally forget to water. I use them for a lot of my annual vegetables.
- Wooden Boxes: I love the look of wooden planters for a rustic or farmhouse vibe. Just be aware that wood will eventually rot. To make them last longer, I always recommend lining the inside with a sheet of plastic (and poking holes in it for drainage) before you add the soil.
- Fabric Grow Bags: These have been a game-changer for me, especially for root vegetables like carrots and potatoes. They are made of a breathable fabric that prevents roots from circling around the bottom of the pot. Instead, the roots “air-prune” themselves, which encourages a healthier, more fibrous root system. They are also lightweight and easy to store in the winter.
A Simple Rule for Choosing the Right Size
It’s tempting to put a tiny seedling in a small, cute pot, but this is a common mistake. Plants need room to grow. A pot that’s too small will restrict root growth, dry out too quickly, and lead to a stunted plant.
- My Rule of Thumb: Always consider the mature size of the plant. A small herb might be happy in a 6-inch pot, but a tomato plant will need a pot that’s at least 5 gallons (about 18-20 inches) to thrive. When in doubt, it’s always better to go one size bigger than you think you need.
Part 2: The Lifeblood of Your Container – Why Your Soil is Everything
This is the second critical lesson I had to learn. You cannot have a healthy container garden without the right soil.
The Day I Brought Bugs into My Kitchen
I’ll never forget the time I tried to save a few dollars by using soil from my yard to pot up an indoor herb. The soil looked fine. A week later, my kitchen had a mysterious and annoying infestation of tiny flying bugs called fungus gnats. They had been living in the garden soil and hatched in the warmth of my home. That was the day I swore I would never, ever use outdoor garden soil in a pot again.

Outdoor soil is heavy, it compacts down into a hard brick when it dries, it doesn’t drain well, and it’s full of weed seeds, insects, and fungal diseases that you do not want to bring into your home.
Demystifying Potting Mix: The “Fluffy Stuff”
The solution is to always use a high-quality potting mix. It’s not actually “soil” in the traditional sense. It’s a specially formulated, sterile mix of ingredients designed to be light, airy, and well-draining. The three main components are:
- The Base (The Spongy Part): This is usually peat moss or coco coir. It’s light and holds onto moisture.
- The Aeration (The Fluffy Part): This is usually perlite (the little white balls) or vermiculite. These ingredients create air pockets in the mix, which are essential for healthy roots.
- The Food (The Nutrient Part): Good potting mixes will have some form of nutrients mixed in, often compost or a slow-release fertilizer.
My Go-To DIY Potting Mix Recipe
While store-bought mixes are great, I love mixing my own. It gives me more control and often saves money. Here’s the simple, all-purpose recipe I use for most of my vegetables and flowers. It’s like a secret formula for success.
- 1 Part Compost: This is the “food.” Use a good quality, well-rotted compost.
- 1 Part Peat Moss or Coco Coir: This is the “sponge” that holds water.
- 1 Part Perlite or Vermiculite: This is the “fluff” that keeps it light and airy.
I just mix these three ingredients together in a large bucket or wheelbarrow, and I have the perfect, fluffy, nutrient-rich home for my container plants.
Part 3: What Should You Grow? My Favorite Plants for Pots
Almost anything can be grown in a container if the pot is big enough, but some plants are just perfectly suited for it. Here are the categories I always recommend to beginners.
The Kitchen Herb Garden

This is the perfect starting point. Having fresh herbs right outside your kitchen door is a game-changer for any home cook.
- Herbs that Thrive in Pots: Basil, Mint, Parsley, Thyme, Rosemary, and Chives are all fantastic choices. Remember my warning: always give Mint its own pot, or this friendly-looking herb will become a garden thug and choke out its neighbors!
The Easiest Vegetables for Your Container Farm
Yes, you can have your own mini-farm on a balcony! The key is choosing the right varieties.

- Lettuce & Salad Greens: These are a must. Their shallow roots are perfect for pots, and the “cut-and-come-again” harvesting method means a continuous supply.
- Tomatoes: You absolutely can grow tomatoes in pots! Just be sure to choose a “determinate” or “patio” variety that stays compact. And give it a big pot—at least 5 gallons.
- Radishes & Carrots: Radishes are super fast and easy. For carrots, choose shorter varieties like ‘Paris Market’ and make sure your pot is deep enough for them to grow down.
- Peppers & Beans: Both hot peppers and bell peppers love the heat of a sunny patio. For beans, choose “bush” varieties that stay compact and don’t need a large trellis.

- 【Product】: Garden Cart Wooden Charcoal box.The product’s width and length can safely accommodate your plants. It provide…
- 【Durable】: Made of high-quality cedar and burned-treated, this seeder cart has high weather resistance. Natural and sust…
- 【Range of application】 It can be placed outdoors all year round in courtyards, balconies, or other outdoor spaces to imp…
The Most Cheerful Flowers for Stunning Planters
Don’t forget the flowers! They add color and attract beneficial pollinators.
- My foolproof choices for beautiful pots are Petunias, Marigolds, and Geraniums.
- A Pro Design Tip: Use the “Thriller, Filler, Spiller” method. Put one tall, dramatic plant in the center (the Thriller), surround it with mounding plants (the Filler), and add trailing plants that spill over the edges (the Spiller).
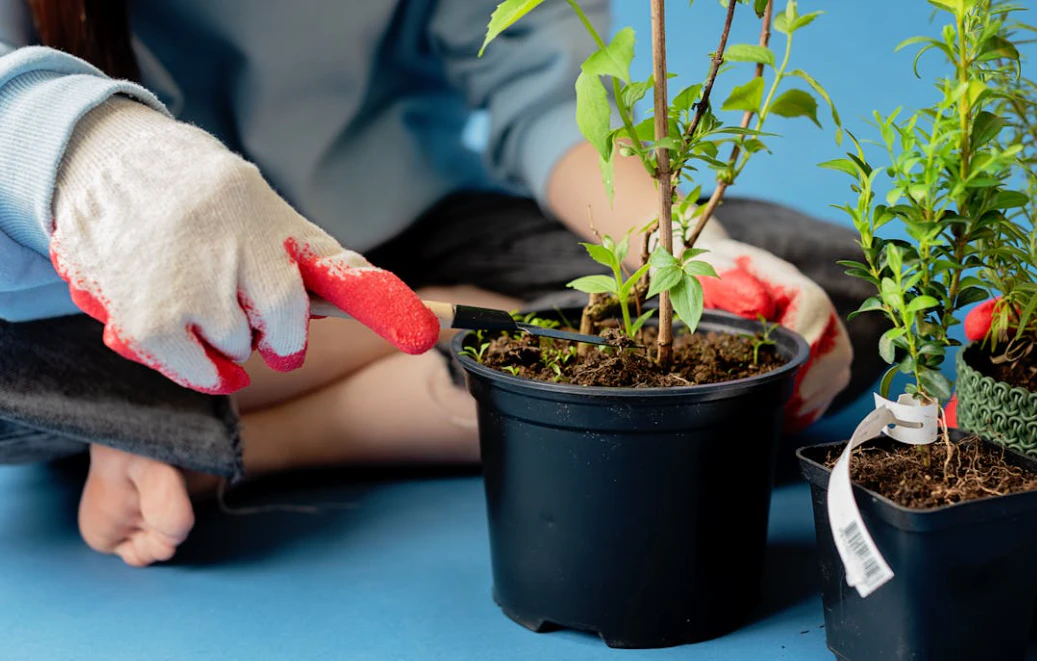
Part 4: The Simple Steps to Planting Your Pot
Once you have your pot, soil, and plant, the final step is to put it all together. Here’s my simple, no-fuss method.
- Cover the Hole (Optional but helpful): I place a small piece of broken pot or a coffee filter over the drainage hole. This stops the soil from washing out but still allows water to escape.
- Add Your Soil: Fill your container about two-thirds full with your high-quality potting mix.
- Tease the Roots: Gently remove your seedling from its nursery pot. If the roots are a tight, tangled mass, gently “tease” or loosen the bottom few roots with your fingers. This encourages them to grow out into the new soil instead of continuing to circle.
- Position and Fill: Place the plant in the pot, making sure the top of its root ball is about an inch below the rim of the container. Fill in the surrounding space with more potting mix, gently firming it down to remove air pockets.
- Water it In: Give your newly potted plant a deep, thorough watering until you see water running out of the drainage holes. This helps settle the soil and eliminates any remaining air pockets.
Part 5: The Daily Dance – How to Water and Feed Containers
This is where caring for a container garden is most different from a garden in the ground. Pots are a more intensive environment, and they rely on you for everything.
The Most Important Job: Watering
The number one reason container gardens fail is improper watering. Pots, especially on a sunny, windy balcony, can dry out incredibly fast.
- My Unbreakable Rule: I use the “finger test” every single day, sometimes twice a day in the peak of summer. I stick my finger two inches into the soil. If it’s dry, I water. If it’s moist, I don’t. It’s that simple.
- Water Deeply, Not Lightly: When you do water, water thoroughly. Pour water onto the soil until it freely runs out of the drainage holes at the bottom. This ensures the entire root ball gets a drink.

The Need to Feed
Because you’re watering so thoroughly and frequently, you’re not just washing out excess water; you’re also washing out nutrients. This means, unlike a garden in the ground, you have to replenish your plants’ food source regularly.
- My Simple Schedule: I feed my container vegetables and flowers every 2 to 4 weeks during the main growing season.
- What I Use: A balanced, all-purpose liquid fertilizer is the easiest option. I’m a big fan of using organic options like liquid seaweed or compost tea. Always follow the dilution instructions on the package—more is not better!
Conclusion: Your Own Portable Paradise
My gardening journey truly began on that tiny balcony with a single pot. It taught me that the desire to grow something is far more important than the amount of space you have. Container gardening is a world of its own—a flexible, creative, and incredibly rewarding way to bring nature, beauty, and fresh food into your life.
It doesn’t have to be a huge, complicated project. It can start today. Just one pot, a bag of good soil, and a single packet of basil seeds is all it takes to begin. That small, portable paradise will teach you, feed you, and bring you a surprising amount of joy.
You don’t need a yard to be a gardener. You just need a pot.