8 Budget-Friendly DIY Garden Path Ideas for Small Backyards
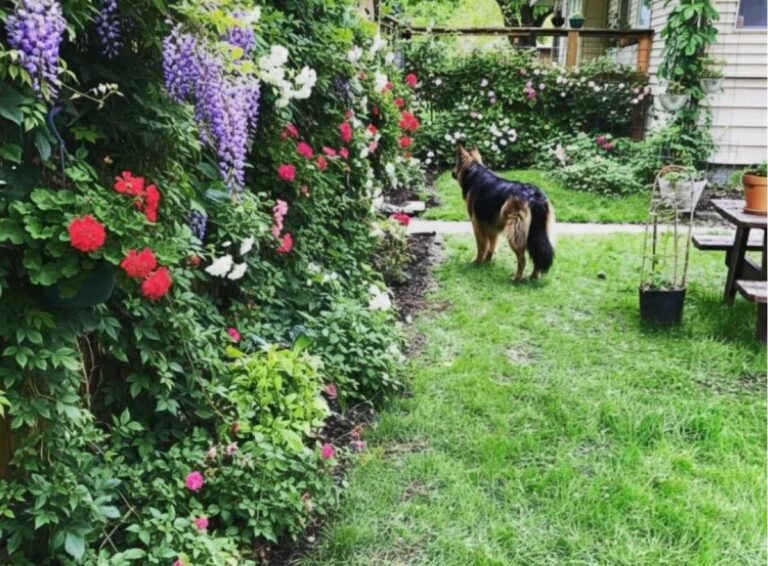
My first backyard garden was tiny, and honestly, a bit of a disaster zone after a good rain. It turned into this muddy obstacle course that I had to navigate just to water my plants. I’d track dirt into the house constantly, my shoes were always a mess, and the whole garden just looked… undefined and chaotic. I felt stuck, thinking a proper path was too expensive or complicated for my little space.
Then I visited my friend Maria’s equally small yard one afternoon. She had laid down a simple, winding path using basic wood chips, and the difference was incredible!
It instantly gave her garden structure, made the whole space feel intentionally designed (and surprisingly bigger!), and, most importantly, kept her feet clean. I realized right then that a garden path isn't a luxury; for a functional and beautiful garden, it's pretty essential. So, if you're tired of muddy shoes and want to add some charm and structure to your small backyard, this guide is for you.
I want to share 8 budget-friendly and totally achievable DIY ideas for creating a beautiful path. You don't need a lot of money or fancy landscaping skills, just a little creativity and a willingness to get your hands dirty (in a good way this time!).
Why Even Bother with a Path in a Small Yard?
It might seem counterintuitive to take up precious growing space with a path, but trust me, the benefits far outweigh the small footprint. A well-designed path is a workhorse that solves multiple problems:
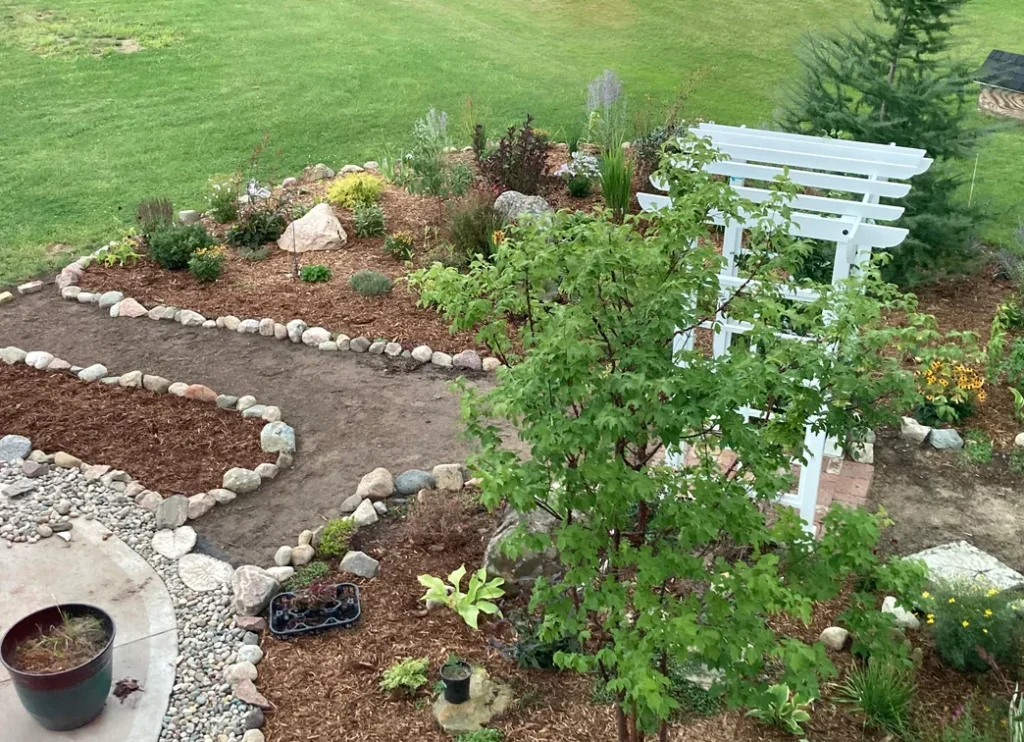
- It Gives Your Garden Bones: A path creates definition and structure. It guides the eye and divides the space into different zones (like a planting area and a sitting area), making even a tiny yard feel more organized and purposeful.
- It Protects Your Plants & Soil: Constantly walking on the same patch of lawn or garden bed compacts the soil, making it hard for roots to breathe and water to penetrate. A dedicated path protects your precious soil.
- Mud-Free Access is Bliss: This one is simple but life-changing. No more tiptoeing through mud or wet grass! A path gives you clean, easy access to your plants for watering, weeding, and harvesting, no matter the weather.
- Instant Charm and Visual Interest: The right path material and shape can add immense character to your garden. It’s a design element that can complement your home’s style.
- The Illusion of Space: As Maria’s winding path proved to me, a cleverly designed path, especially one with gentle curves, can trick the eye and make a small space feel longer and more intriguing. This is a neat trick used in many small space garden designs.
8 Easy & Affordable DIY Path Ideas Anyone Can Make
Ready to ditch the mud? Here are eight ideas, ranging from super simple to slightly more involved, that won't break the bank.
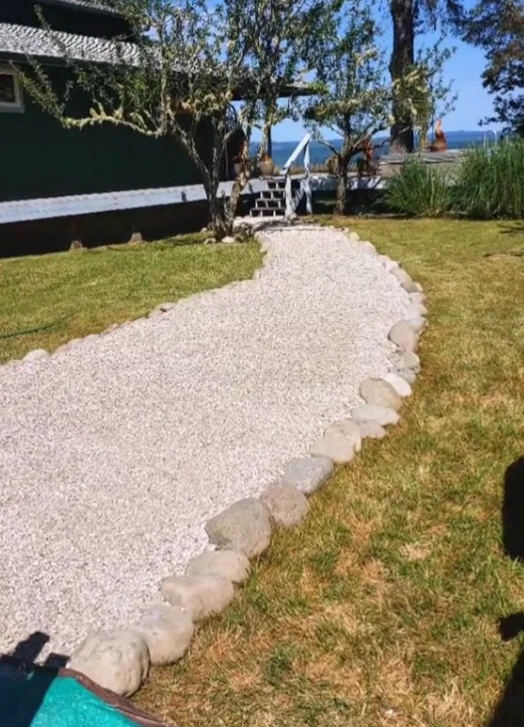
1. The Simple Charm of a Pea Gravel Path
Small, smooth pea gravel is a classic choice for a reason. It's affordable, relatively easy to install, and has a lovely, soft crunch underfoot. It can look modern or traditional depending on the edging you choose.
- My Experience: This was one of the first paths I ever installed myself. It looked great instantly! My biggest lesson learned? You absolutely must put down landscape fabric underneath to stop weeds from popping through, and use sturdy edging (like metal strips or bricks) to keep those little stones from escaping into your lawn or garden beds.
2. A Soft & Natural Walkway with Mulch
This is probably the cheapest and most natural-looking option. Using organic mulch like wood chips, shredded bark, or even pine needles creates a soft, quiet path that blends beautifully into a garden setting.
- Maria's Inspiration: This is the type of path my friend Maria used that first inspired me. It’s incredibly budget-friendly, especially if you can get free wood chips from local tree services. The main thing to remember is that organic mulch decomposes over time, so you'll need to top it up every year or two to keep it looking fresh.
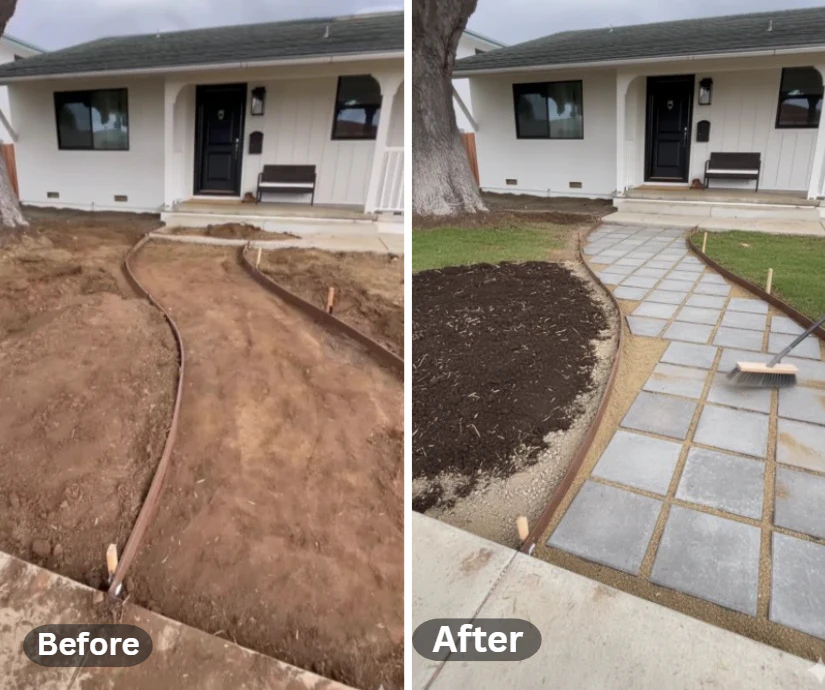
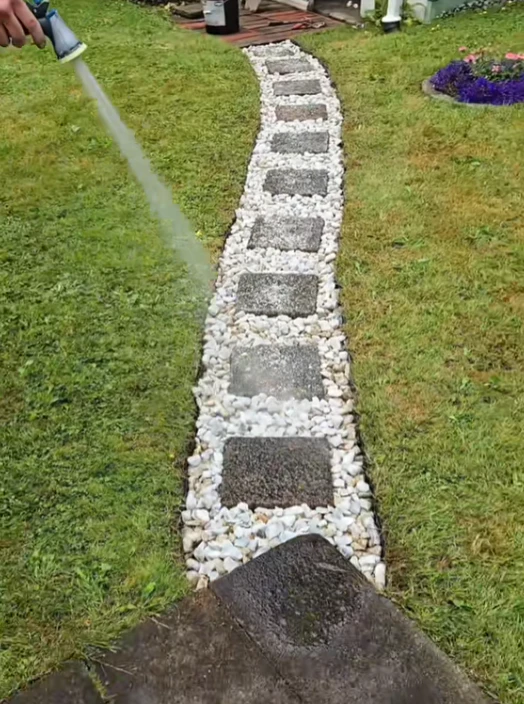
3. Classic Stepping Stones: Pavers or Flagstone
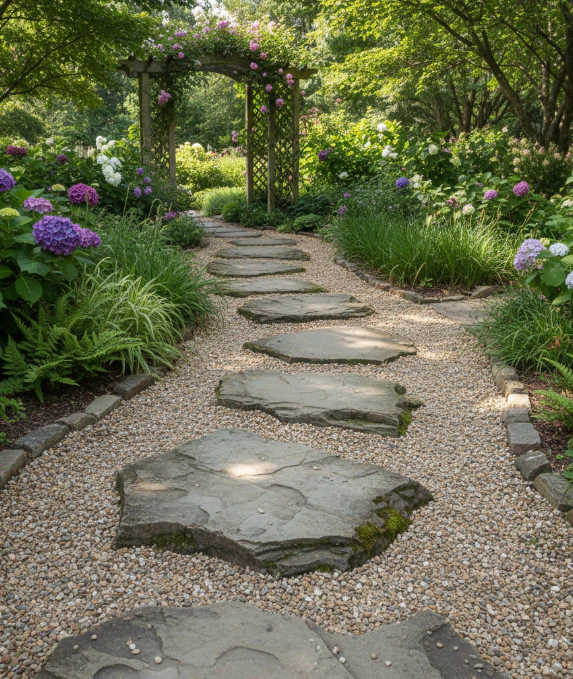
Placing individual flat stones or concrete pavers spaced apart within your lawn or a gravel bed is a timeless look. It creates a clear path without needing to cover the entire area.
- A Tip I Learned: I love using large, irregular flagstones set directly into my lawn. It feels very organic. The trick is to dig out the sod underneath each stone so it sits slightly below the level of the grass. This way, your lawnmower can pass right over them without hitting the stone—a huge time-saver!
4. Rustic Beauty with Reclaimed Bricks
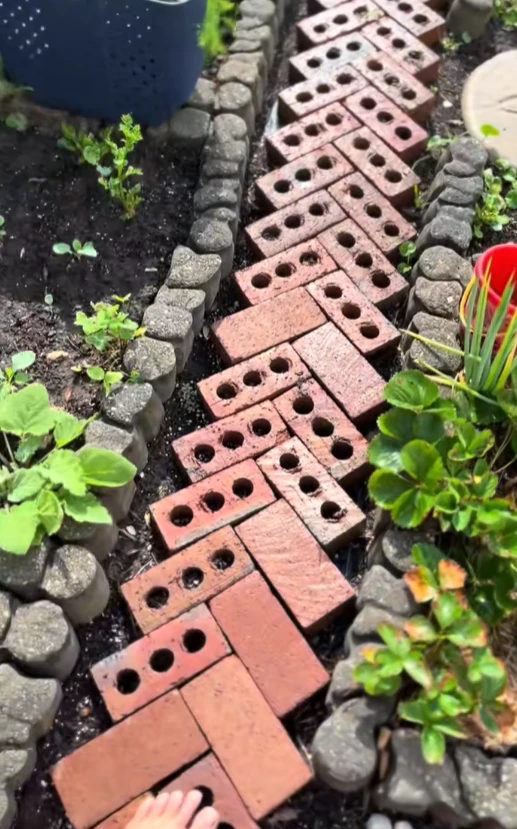
There's something incredibly charming about a path made from old bricks. They bring a sense of history and warmth to the garden. Plus, finding reclaimed bricks can be very budget-friendly.
- David's Story: My friend David is a master scavenger. He found a pile of old bricks from a demolished building (with permission, of course!) and created the most beautiful, rustic path in his garden for almost nothing. Laying them in a pattern like herringbone or basketweave takes patience, but the result is stunning and will last forever.
5. A Whimsical Path from Wood Slices
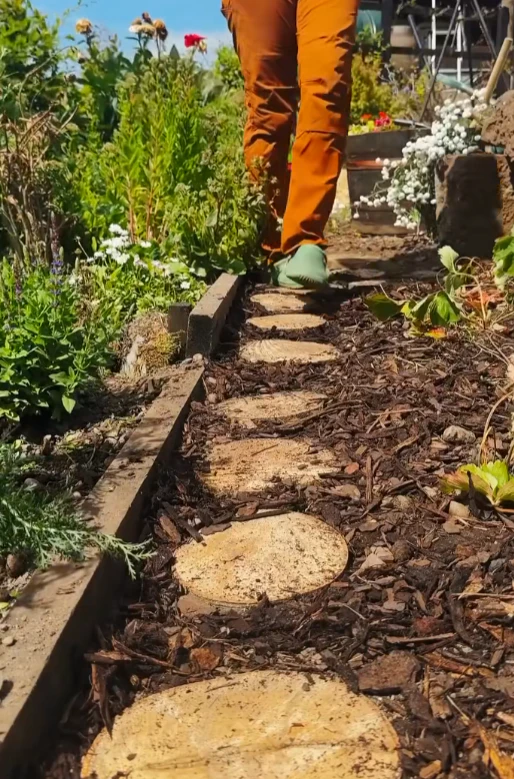
Using slices cut from tree logs or thick branches creates a magical, woodland-inspired path. It looks particularly wonderful in shady, naturalistic gardens.
- A Word of Caution: These look absolutely enchanting, especially when moss starts to grow between them. But be warned: unless you use a naturally rot-resistant wood like cedar and seal it well, untreated wood slices will decay relatively quickly, especially in damp climates. Consider this a beautiful but possibly temporary solution.
6. Get Creative with DIY Concrete Pavers
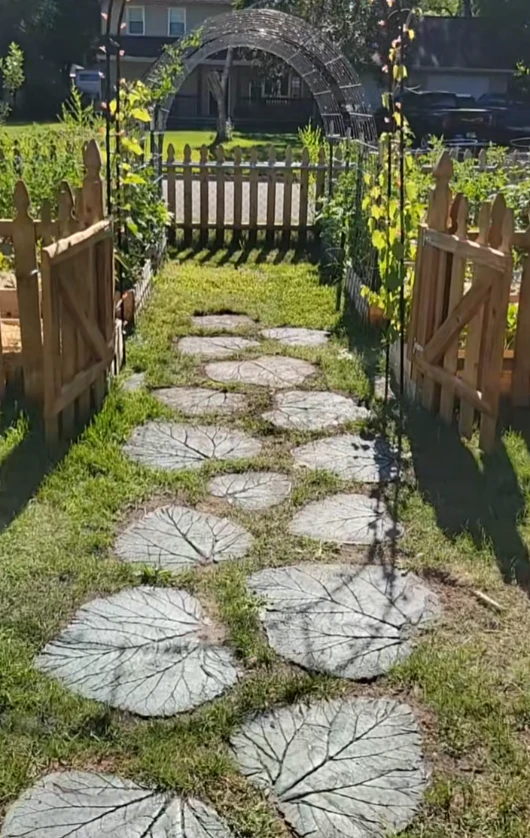
Did you know you can make your own stepping stones? You can buy inexpensive plastic moulds in various shapes (like leaves, circles, or hexagons) at craft or garden stores. Just mix some concrete, pour it into the mould, and let it cure.
- My Fun Weekend Project: I tried this one summer, and it was a really fun project! You can personalize your stones by adding concrete colorant, or by pressing pebbles, leaves, or even your handprints into the surface before it fully sets. It’s a great way to add a unique, personal touch to your garden path.
7. A Coastal Vibe with Crushed Shells
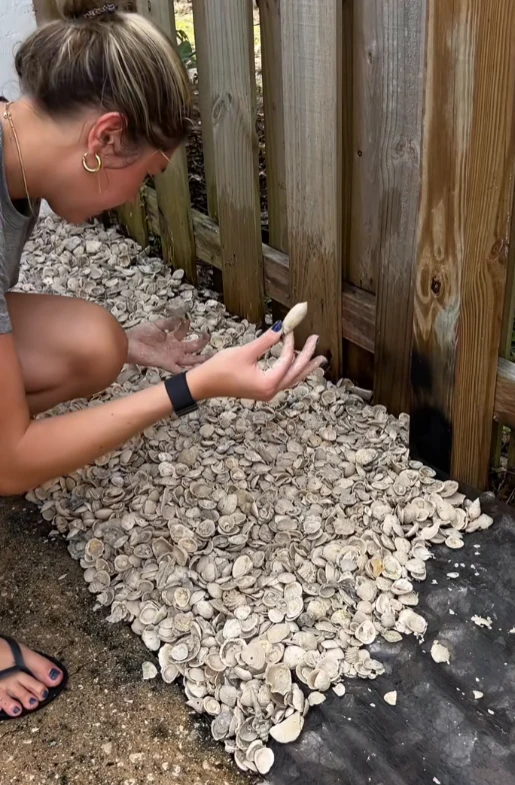
If you live near the coast or just love that beachy feel, a path made from crushed oyster shells or other seashells can be a beautiful and unique option. It drains well, looks bright, and makes a satisfying crunch when you walk on it. Availability and cost will vary greatly depending on your location, but it's worth looking into for a distinctive look.
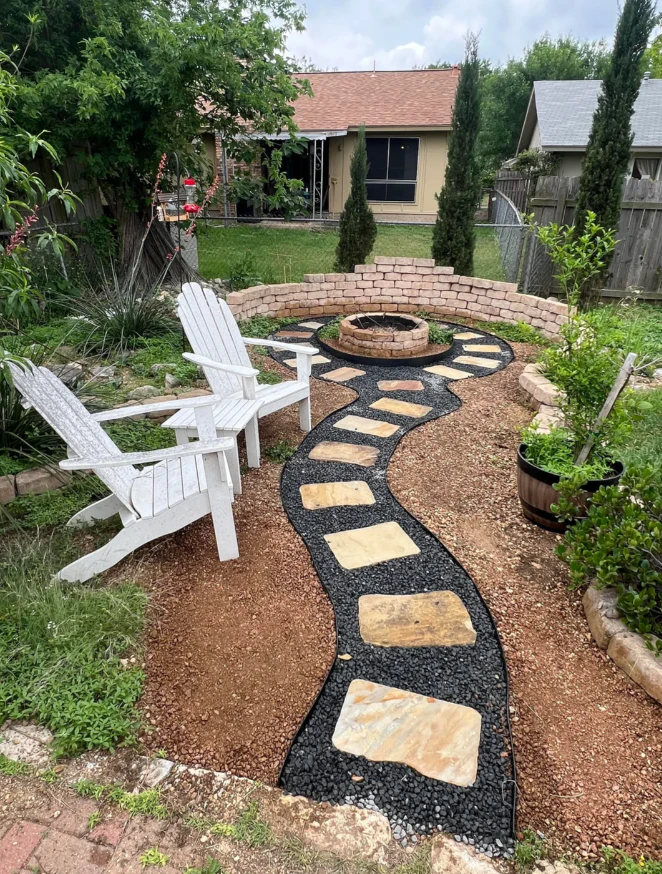
8. Mix It Up! Combining Materials
Don't feel like you have to stick to just one material! Some of the most interesting paths combine two different textures.
- My Current Path: I currently have a path made of large flagstone steppers, and I filled the wide gaps between them with dark pea gravel. The contrast between the smooth stone and the textured gravel looks really sophisticated and helps keep weeds down. Other ideas include using brick edging along a mulch path, or setting wood slices within a gravel base.
A Few Hard-Learned Tips Before You Start Digging
Okay, before you get too excited and start digging, let me share the most important lesson I learned (the hard way, of course).
Don't Skip the Base Prep! (My Biggest Path Mistake)
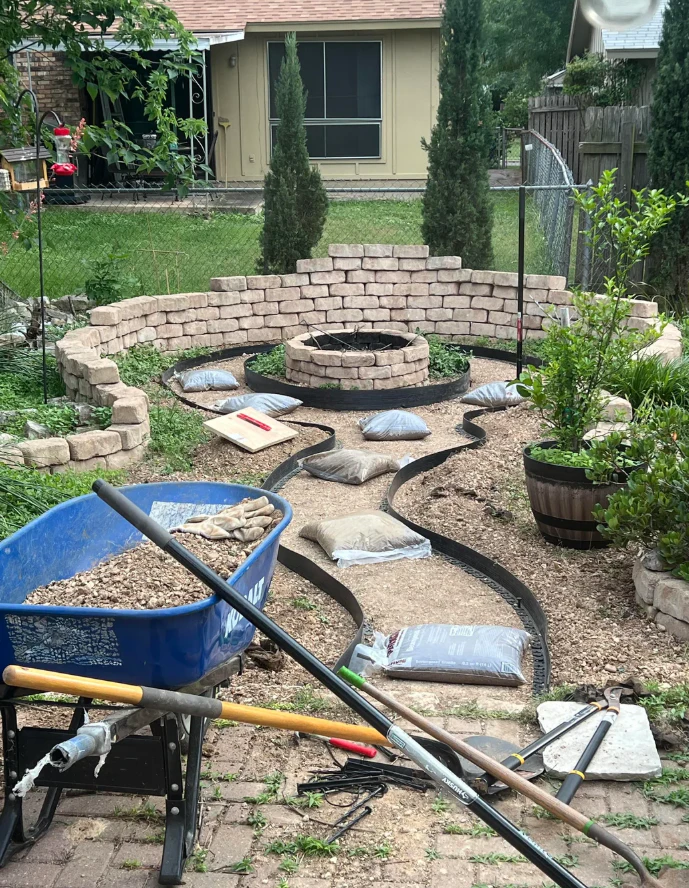
My very first gravel path looked amazing… for about a month. Then, the weeds started pushing through relentlessly, and the gravel began sinking into the mud below. It was a disaster. Why? Because I hadn't prepared the base properly. This step is boring, but it is absolutely essential:
- Plan your route: Use a rope or garden hose to lay out the shape of your path first.
- Dig out the sod/soil: Remove the grass and about 3-4 inches of soil within your marked path area.
- Level the ground: Tamp down the soil to create a firm, level base.
- Lay down landscape fabric: This is crucial! This fabric barrier allows water to drain through but stops weeds from growing up. Overlap the edges well.
- Add your path material: Now you can add your gravel, mulch, or sand base for pavers.
Trust me on this: Do not skip the landscape fabric! You will regret it later.
Edging is Your Best Friend
To keep your path looking neat and prevent materials like gravel or mulch from spilling into your lawn or garden beds, you need an edge. This can be as simple as affordable plastic or metal edging strips, or more decorative options like bricks set on their side, stones, or treated wood timbers.
Conclusion: Step into a More Beautiful Backyard
Creating a beautiful and functional garden path doesn't require a huge budget or professional help. As these simple and affordable DIY ideas show, with a little planning and creativity, you can transform your small backyard from a muddy patch into a charming and structured oasis.
A path does more than just keep your feet clean; it invites you into the garden, guides your journey, and adds a finishing touch that makes the whole space feel complete. So, pick an idea that sparks your interest, grab your shovel (and that landscape fabric!), and take the first step towards building the garden path you've always wanted.