Trash to Treasure: 19 Creative Upcycled Planter Ideas for Your Garden
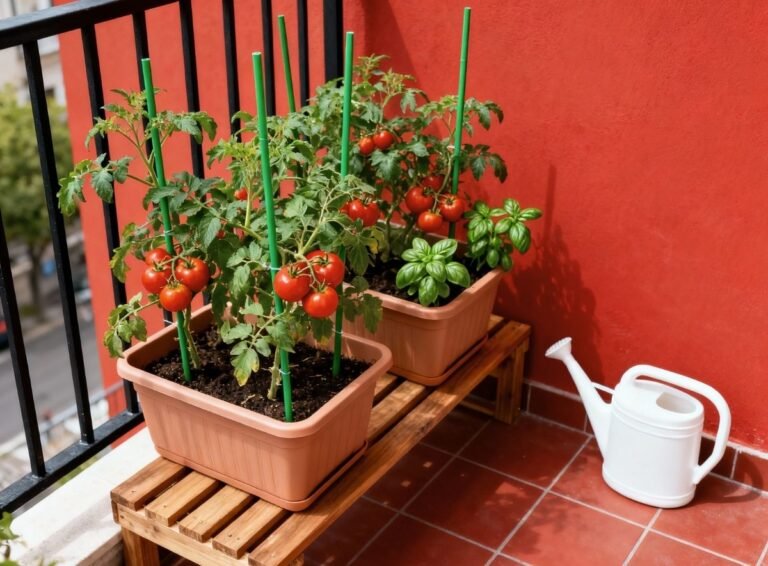
Let's be honest, buying beautiful pots for all the plants we dream of growing can seriously drain the gardening budget! I remember my early days, wandering through a garden center, falling head over heels for a gorgeous, big ceramic planter... only to see the price tag and quickly shuffle away, my wallet practically weeping. It felt like having a beautiful garden was a luxury I couldn't quite afford.
But then, inspired by my incredibly resourceful friend Maria, I started looking around my own home, garage, and even the recycling bin with new 'gardener eyes.' That old metal colander with a broken handle? Those empty coffee tins piling up? That pair of my daughter's outgrown rain boots? Suddenly, I didn't see trash; I saw potential. I saw planters waiting for a second chance.
In this guide, I want to share 19 of my favorite creative and super budget-friendly ways to turn everyday discarded items into unique and charming planters. Let's get our creative juices flowing, save some serious money, and give some old items a beautiful, green new life!
More Than Just Saving Pennies: Why Upcycling is Awesome
Okay, saving money is a huge plus, no doubt. More money saved means more money for amazing plants, right? But upcycling items into planters goes way beyond just being kind to your wallet.
- It's a Hug for the Planet: Every tin can or old tire you turn into a planter is one less piece of trash going into a landfill. It feels good knowing you're reducing waste and gardening more sustainably. It’s one of the best eco-friendly garden hacks you can adopt.
- Your Garden Will Be Uniquely You: Forget the rows of identical terracotta pots everyone else has. Upcycled planters inject personality and charm into your garden. They tell a story. Your garden becomes a reflection of your creativity, completely unique and unlike any other.
19 Inspiring Ways to Give Trash a Glorious Gardening Encore
Ready to see trash differently? Here are some ideas that have worked for me and my friends, ranging from super simple to a little more adventurous.
1. The Cheerful Charm of Tin Can Planters
This is probably the easiest place to start. Those empty cans from soup, coffee, or canned vegetables are perfect little homes for small plants.
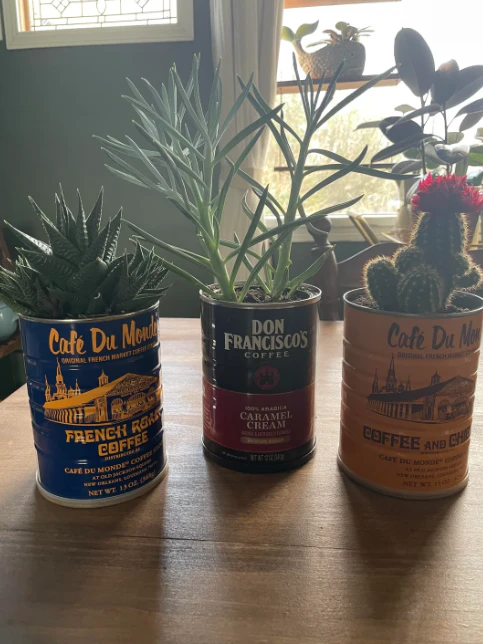
- Getting Started: Just wash the can thoroughly, carefully smooth out any sharp edges around the rim (I use pliers for this), and punch a few holes in the bottom for drainage using a hammer and nail. That's it!
- Adding Personality: You can leave them with their original labels for a quirky look, paint them in bright colors (my kids love doing this part!), or wrap them in twine for a rustic feel.
- Perfect Plants: They're ideal for small herbs like basil or parsley on a windowsill, cheerful annual flowers like pansies, or a collection of small succulents.
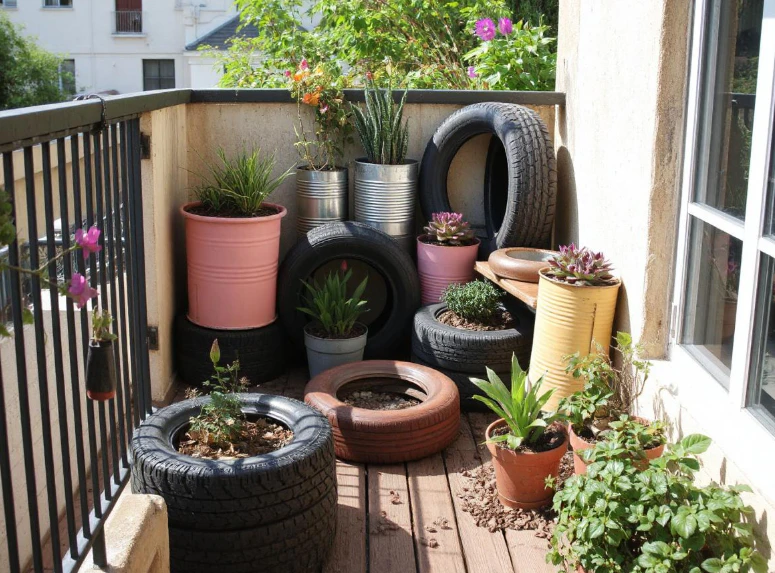
2. Giving Old Tires a Colorful Spin
Used tires are a huge environmental problem, but they can make surprisingly cool and incredibly durable planters.
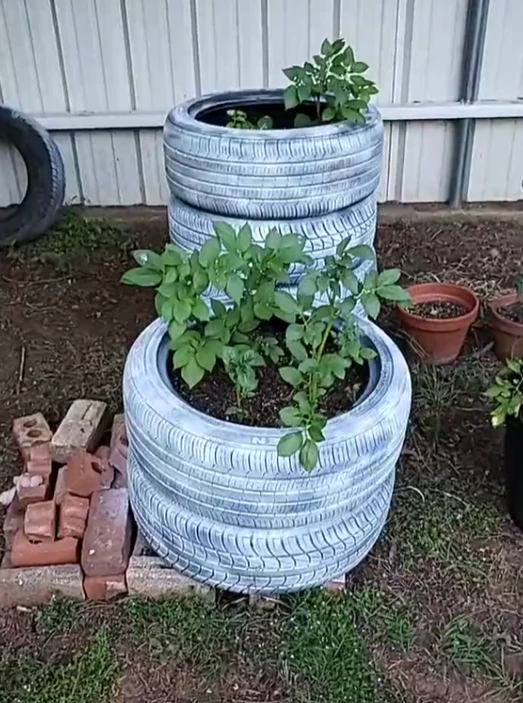
- The Transformation: The key is to clean them well and then get creative with paint. A stack of tires painted in vibrant, cheerful colors can become a real focal point.
- My Friend David's Potato Patch: My friend David is brilliant at this. He stacked three old tires painted bright blue in a sunny corner of his yard. He fills it with soil and grows potatoes! As the plants grow, he adds another tire and more soil on top. It’s a genius way to grow a deep-rooted crop easily.
- Things to Consider: Some people worry about chemicals leaching from tires into the soil. If you're concerned about this, use tire planters for flowers rather than edible vegetables, or line the inside with heavy-duty plastic before adding soil.
3. Rustic Beauty from Wooden Crates & Drawers
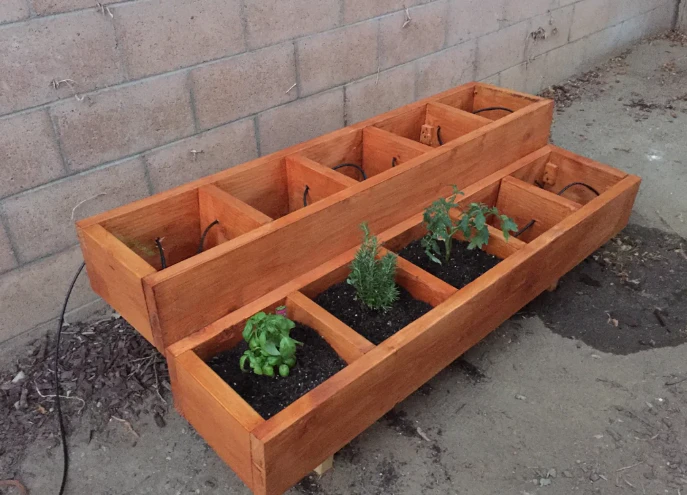
Old wooden crates (like the ones used for fruit or wine) or even discarded drawers from an old dresser bring instant rustic charm to a garden.
- Making Them Last: Wood will eventually rot when in contact with damp soil. To extend their life significantly, I always line the inside with a layer of landscape fabric or thick plastic (making sure to poke drainage holes in the plastic) before adding the potting mix.
- The Look: They look fantastic filled with a tumble of herbs, colorful annuals, or even shallow-rooted vegetables like lettuce. They bring that cozy, farmhouse feel effortlessly.
4. Putting Your Best Foot Forward: Boots & Shoes
Okay, this one always gets a smile! Planting in old boots or shoes is quirky, fun, and totally unexpected.

- Which Ones Work Best? Sturdy leather work boots or colorful rubber rain boots (like my daughter's old red ones!) work brilliantly. Even old sneakers can work for a season or two.
- Getting Them Ready: The most important step is creating drainage. Use a drill or a sharp knife to make several holes in the sole. Then just fill with soil and plant!
- Perfect Plants: Because the space is small, stick to shallow-rooted annual flowers like lobelia or alyssum, or hardy succulents that don't mind drying out a bit. It’s a guaranteed conversation starter.
5. The Humble Plastic Bottle's Second Act
Don't underestimate the simple plastic bottle! With a little creativity, these can become incredibly useful planters, especially for small spaces or starting seeds.
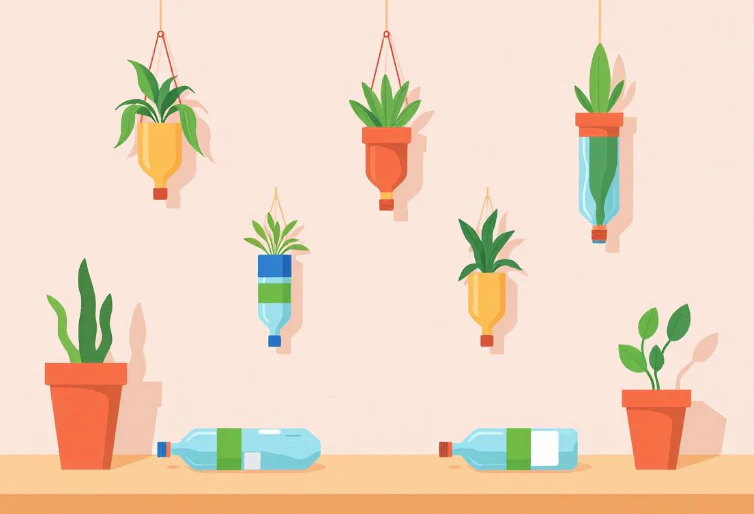
- Simple Planters: Cut a large soda bottle in half horizontally. The bottom part, with a few drainage holes poked in, makes a perfect little pot for seedlings or small herbs.
- Self-Watering Wonders: You can get fancy and create a self-watering planter by inverting the top half of the bottle into the bottom half, running a wick through the cap.
- Going Vertical: Cut bottles can also be attached to a wall or fence to create components for a vertical herb garden – a fantastic way to grow up when you can't grow out!
6. Beauty in Brokenness: Repurposed Pottery
Dropping a beloved terracotta pot feels awful. But wait – don't throw those pieces away! Broken pottery can have a beautiful second life.
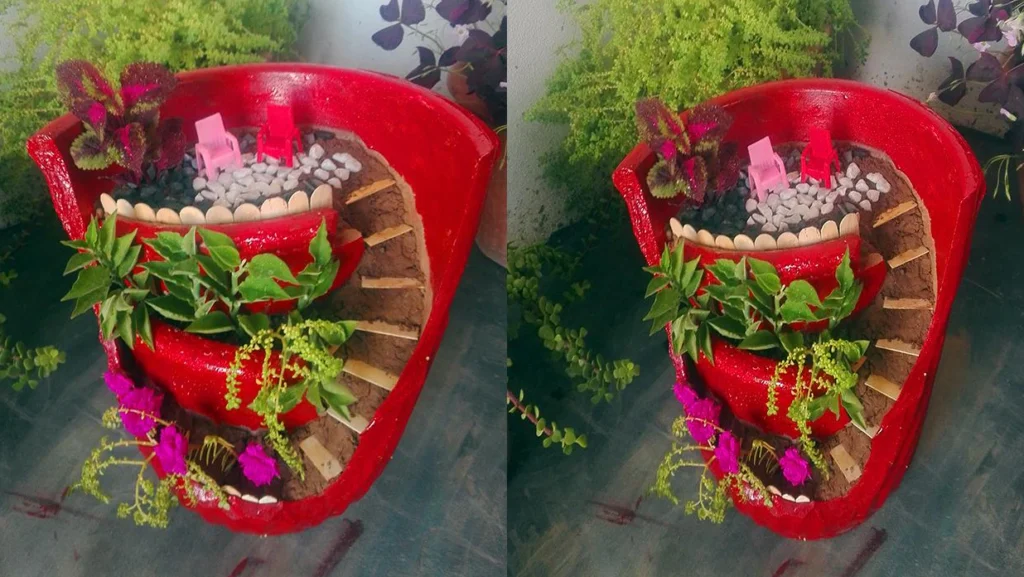
- The "Fairy Garden" Approach: My friend Sarah does this beautifully. She takes a large broken pot, lays it on its side in the garden bed, and arranges the broken shards to look like little steps or terraces leading out. She then plants tiny succulents and mosses around it, creating a magical miniature landscape.
- Kintsugi Inspiration: You can even try gluing the pieces back together using a strong, waterproof adhesive, perhaps highlighting the cracks with gold paint in the style of the Japanese art of Kintsugi, celebrating the beauty of imperfection.
7. Kitchen Colander Hanging Baskets
An old metal colander with its built-in drainage holes is practically begging to become a hanging basket!
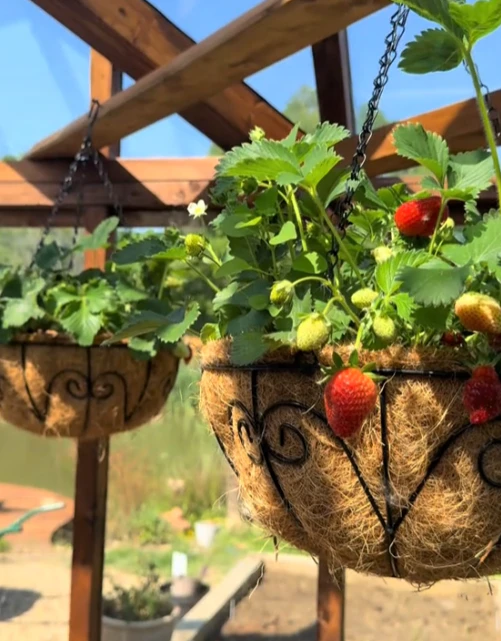
- Making the Switch: Just line the inside with coco coir liner or sphagnum moss to hold the soil in, fill it with potting mix, and plant your favorite trailing flowers (like petunias or fuchsias) or even strawberries. Attach some chains or sturdy rope, and you have an instant, charming hanging planter.

- What You Will Get: you will receive 4 pieces of hanging baskets, which have coconut fiber liners and metal baskets, and ...
- Reliable and Considerate: our plant hanging basket is equipped with a metal frame and 3 chains, which have strong bearin...
- Easy to Install: our hanging basket planter comes with 1 hook and 3 chains, convenient for you to hang it at the place y...
8. Vintage Charm: Old Watering Cans & Buckets
There's something incredibly nostalgic about using an old, perhaps slightly rusty, metal watering can or bucket as a planter.
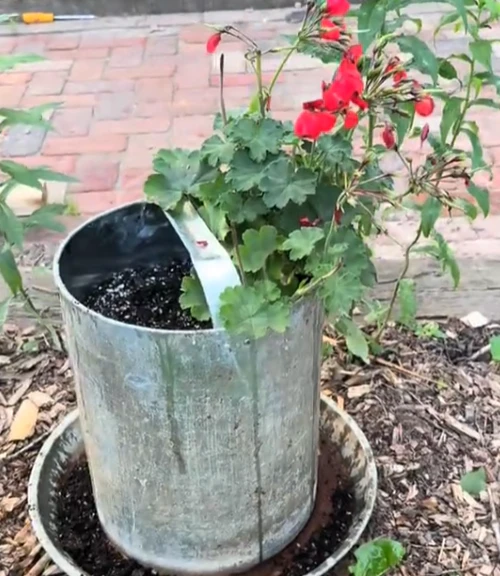
- The Look is Everything: Don't worry if it's a bit dented or leaky – that's part of the charm! Just make sure to drill a few drainage holes in the bottom if it doesn't already leak enough.
- Perfect Plants: They look wonderful filled with a simple planting of bright red geraniums or a mix of kitchen herbs, placed right by the back door.
9. From Tea Time to Thyme Time: Teacups & Teapots
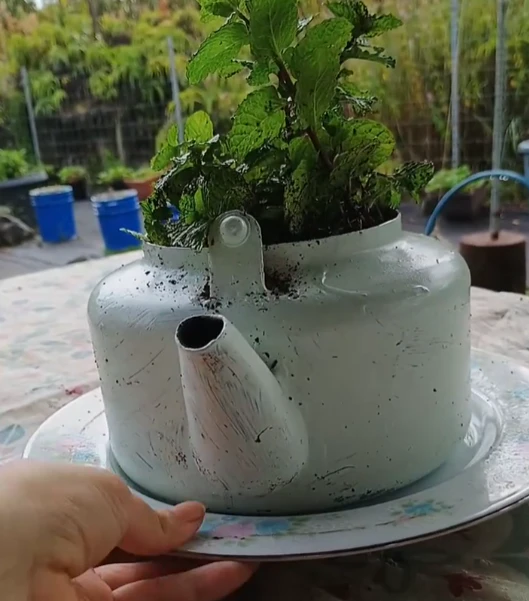
Have a chipped teacup or a teapot with a broken lid? Don't toss it! These delicate items can become the sweetest little planters for tiny succulents or miniature herbs.
- Making it Work: The biggest challenge here is drainage. You'll need a special diamond-tipped drill bit to carefully create a drainage hole in the bottom of ceramic or porcelain. It sounds intimidating, but it's easier than you think if you go slowly.
- The Look: A collection of mismatched, vintage teacups planted with tiny Sempervivums (hens and chicks) looks absolutely adorable on an outdoor table or windowsill.
10. Bathtime Botanicals: The Grandeur of an Old Tub
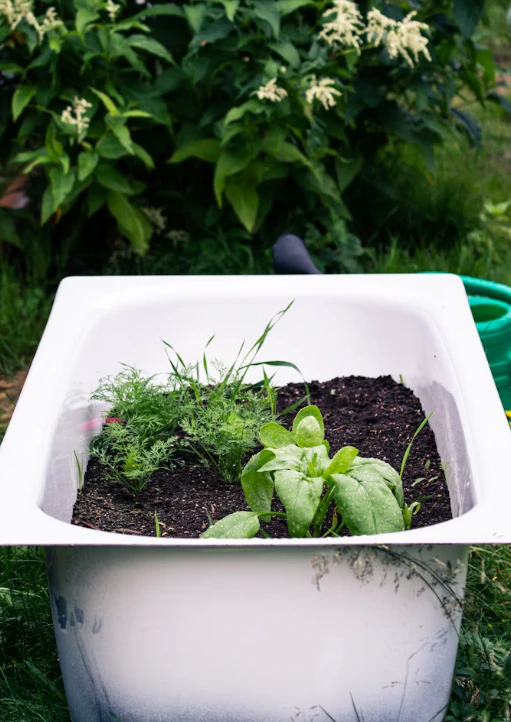
This one requires a bit more space, but the result is a real showstopper. An old, discarded bathtub, especially a classic clawfoot tub, makes an incredibly unique and spacious planter.
- My Dream Project: I haven't done this myself yet, but my friend Emily rescued an old tub and turned it into a stunning mini vegetable garden right in the middle of her small yard. It's deep enough for root vegetables and large enough for several tomato plants!
- Things to Consider: Ensure the drain hole is clear for excellent drainage. You might want to place a layer of gravel at the bottom before adding your soil mix.
11. Tool Time Transformation: Planting in Old Toolboxes
Old metal or wooden toolboxes, especially those vintage ones with a bit of character, make fantastic planters.
- How It Works: Simply open the toolbox, line it if necessary (especially if it's metal and might get hot), ensure there's drainage (drill holes if needed), and fill it with soil.
- The Vibe: It adds a quirky, industrial, or rustic touch depending on the toolbox. They look particularly great planted with tough, low-growing herbs or succulents that spill over the sides.
12. Sustainable Sips: Cut Wine Bottle Planters
This requires a specific tool (a bottle cutter), but the result is a very sleek and modern planter. Cutting the bottom off a wine bottle creates a perfect little container.
- The Process: Scoring and carefully separating the glass takes practice, and sanding the cut edge smooth is crucial for safety. Once done, you can use the bottom part directly as a pot (with added drainage holes) or use both halves to create a self-watering planter.
- Perfect For: Small succulents, cacti, or rooting cuttings. They look fantastic grouped together on a shelf.
13. Wheelbarrow Wonders: A Mobile Garden Bed
Got an old, rusty wheelbarrow that no longer holds air in its tire? Don't send it to the scrap heap! It can become a charming and mobile raised bed.
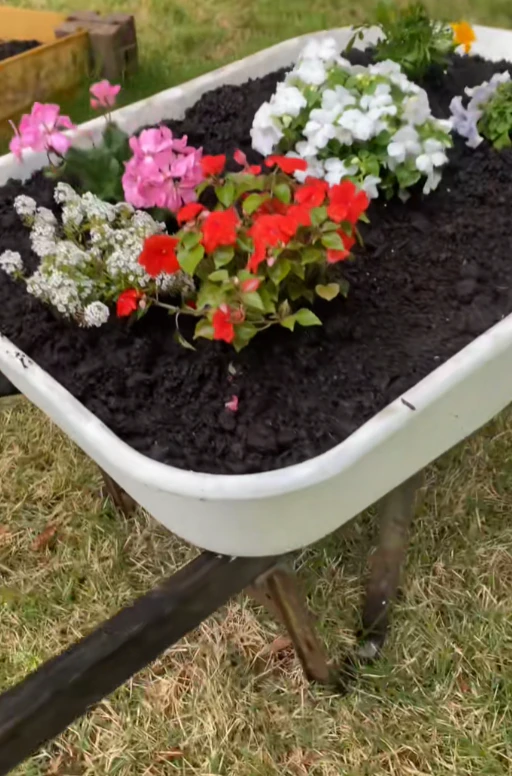
- The Advantage: Its mobility! You can wheel it around to catch the best sun or move it out of the way when needed. Just drill plenty of drainage holes in the bottom.
- What I Grow: I have an old wheelbarrow filled with different types of lettuce and salad greens right near my kitchen door. It’s wonderfully convenient.
14. Living Wall Art: Old Picture Frames
I saw this at my friend Sarah's place, and it absolutely blew me away! She turned an old, ornate wooden picture frame into a stunning vertical succulent garden.
- Making the Magic: She attached a shallow wooden box to the back of the frame, lined it with landscape fabric, added a layer of chicken wire on top to hold the soil, and then filled it with succulent potting mix. She planted dozens of tiny succulents through the wire mesh.
- The Result: It literally looks like a piece of living wall art. It takes patience to plant, but the result is breathtaking and a fantastic conversation piece.
15. Musical Roots: Planting in Old Instruments

This is definitely on the quirky end of the spectrum, but the results can be incredibly artistic. An old, unusable guitar case, a dented tuba, or even a snare drum can be transformed into a unique planter.
- Things to Consider: You'll need to think carefully about drainage and lining the inside to protect the instrument from moisture damage as much as possible. This is more about creating a temporary, artistic statement than a long-term planting solution. But oh, the photos you'll get!
16. Bag It Up: Reusable Shopping Bags as Grow Bags
Those sturdy, reusable shopping bags, especially the ones made from woven polypropylene or jute, make surprisingly good grow bags.
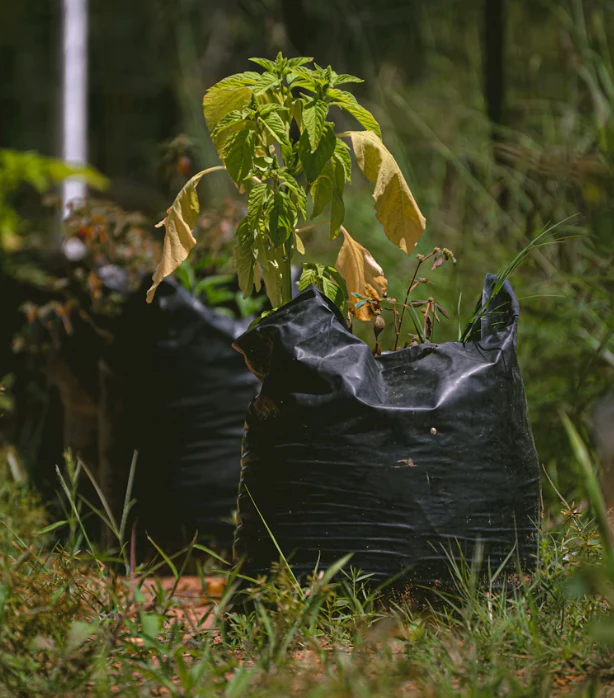
- Why They Work: They are strong, breathable (which is great for roots, similar to fabric grow bags), and have built-in handles for easy moving. Just make sure to poke some drainage holes in the bottom.
- What I Use Them For: They are absolutely perfect for growing potatoes or sweet potatoes. As the plants grow, you can simply roll down the sides of the bag to add more soil around the stems (hilling).
17. Kitchen Castoffs: Old Baking Pans & Muffin Tins
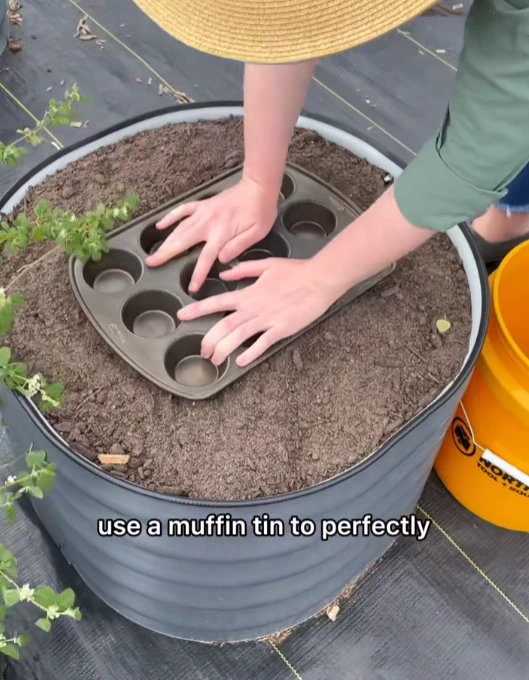
Don't throw away that rusty old muffin tin or baking pan! With a few drainage holes drilled in the bottom, they become perfect little multi-compartment planters.
- Perfect For: Starting seeds indoors or creating a miniature succulent garden where each plant has its own little pocket. The shallow depth works well for plants with small root systems.
18. Birdcage Botanicals: A Touch of Vintage Romance
An old, decorative birdcage can be transformed into a stunning hanging planter, especially for trailing plants or air plants.
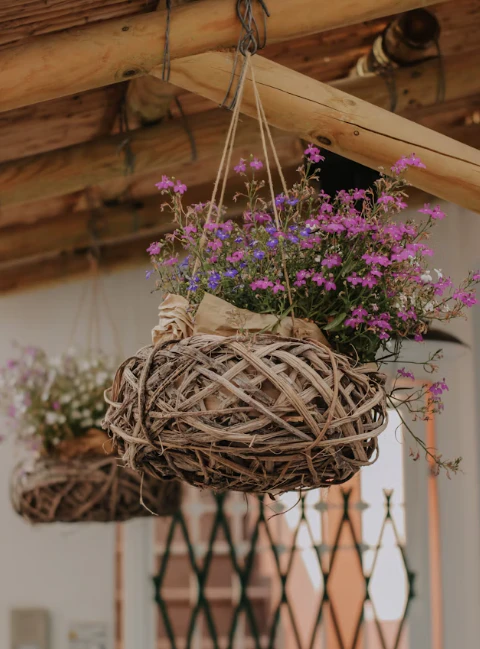
- Making it Work: Line the bottom part of the cage with coco liner or sphagnum moss to create a planting base. Plant trailing beauties like String of Pearls, ivy, or small ferns. You can let them cascade out through the bars.
- The Look: It creates a beautiful, romantic, vintage feel, perfect for a porch or shady corner.
19. Barrel of Fun: The Mighty Wooden Barrel Planter
Old wine or whiskey barrels, often cut in half, make fantastic, large, rustic planters.
- Why They're Great: They offer a generous amount of planting space, deep enough for even small shrubs, dwarf fruit trees, or a substantial vegetable garden. Their thick wood also provides good insulation for the roots.
- Finding Them: You can often find used barrels at wineries, breweries, or sometimes even garden centers. Just ensure they have drainage holes drilled.
Before You Transform Your Trash: A Few Quick, Important Tips
Okay, feeling inspired? Awesome! Just keep these few practical things in mind before you start planting in that old boot.
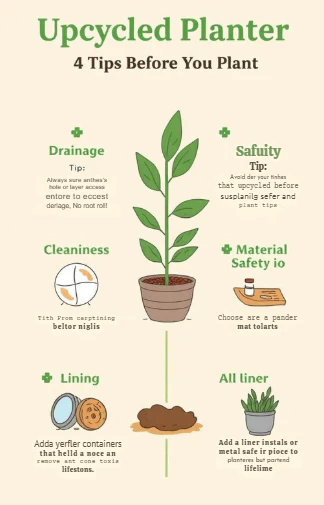
- Drainage is Still King! I know I keep saying this, but it’s the most crucial factor for any container. No matter what you're using, make absolutely sure excess water has a way to escape. Drill those holes!
- Clean It First: Give your chosen item a good scrub before you add soil. You don't want any lingering residues harming your plants.
- Think About Safety (Especially for Edibles): Be mindful of what your container is made of, especially if you plan to grow food. Avoid using wood that has been treated with toxic chemicals (like old railroad ties or some pressure-treated lumber). If you're unsure about a plastic container's safety, it might be best to use it only for flowers.
- Lining Might Be Your Friend: For materials that might rot quickly (like untreated wood) or get very hot (like dark metal), adding a simple liner of landscape fabric or plastic can extend the life of your planter and protect plant roots.
Conclusion: See the Potential Everywhere!
Once you start looking at the world through "upcycler gardener" eyes, you'll see potential planters everywhere! Your garage, the thrift store, even the side of the road might hold the key to your next unique and beautiful garden creation.
There's a special kind of satisfaction that comes from taking something old and forgotten and giving it a new, green life. It's creative, it's sustainable, and it makes your garden a true reflection of you.
So, go ahead. Rescue that old colander, paint those tin cans, give those worn-out boots a purpose. Start small, have fun, and embrace the delightful journey of turning trash into treasure.