Preserve Your Harvest: A Beginner’s Guide to Drying Herbs and Freezing Vegetables
There's a bittersweet moment at the end of every gardening season. You're so proud of your abundant harvest, but you're also sad to see your beautiful, productive plants go. I'll never forget the first year I grew a truly magnificent basil plant. It was a huge, fragrant bush, and I felt like a gardening king. Then, the first frost hit. Overnight, the entire plant turned a sad, blackened mush. I stood there looking at it, realizing I had let so much incredible flavor go to waste.
That was the moment I discovered the simple magic of food preservation. I realized that the harvest doesn't have to end just because the season does. In this guide, I'll share my two favorite, super-easy methods for beginners to save their summer bounty: drying herbs and freezing vegetables. Let's capture the taste of your garden to enjoy all winter long.
- The Joy of a Winter Pantry: Why This is Worth Your Time
- Part 1: Drying Herbs – How to Bottle the Scent of Summer
- Part 2: Freezing Vegetables – How to Lock in Peak Garden Freshness
- A Special Note on the Summer Superstars: Tomatoes & Peppers
- One More Fun Idea: Herb-Infused Ice Cubes
- Conclusion: A Taste of Summer on a Winter Day
The Joy of a Winter Pantry: Why This is Worth Your Time
Before we get into the "how-to," let me tell you why I've become so passionate about this. Preserving your own food isn't some old-fashioned chore; it's one of the most rewarding parts of the entire gardening journey.
- You Get to Taste Sunshine in Winter: There is nothing and I mean nothing like opening a jar of your own dried oregano in the middle of January and being hit with the intense, fragrant smell of your summer garden. It’s a powerful connection to the seasons that you just can't buy.
- It Saves Money and Slashes Waste: Every leaf of basil you dry or handful of beans you freeze is one less thing you have to buy at the grocery store and one less thing that goes to waste from your garden. It’s a win for your wallet and a win for the planet, something we've explored in our other eco-friendly garden hacks.
- You Know Exactly What You're Eating: When you preserve your own food, you know exactly what's in it. No strange chemicals, no preservatives just the pure, delicious flavor of the food you grew with your own two hands.
Part 1: Drying Herbs – How to Bottle the Scent of Summer
Drying herbs is the easiest and most romantic way to begin your food preservation journey. It requires almost no special equipment, and the results are incredibly satisfying.
A Quick Note: Not All Herbs Dry Equally Well
I learned early on that different herbs prefer different preservation methods.
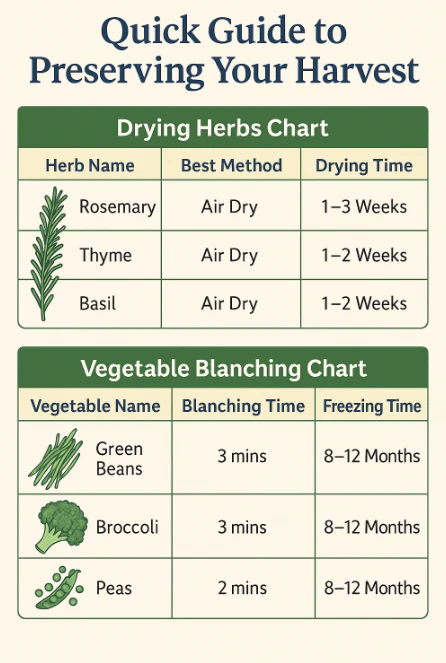
- Herbs that are PERFECT for Drying: These are typically the more woody, low-moisture herbs from the Mediterranean. Their flavor concentrates beautifully when dried. My top choices are Rosemary, Thyme, Oregano, Sage, and Mint.
- Herbs that are Often Better Frozen: Softer, more delicate herbs with a high moisture content can sometimes lose their flavor when dried. I find that Parsley, Chives, and Cilantro keep their fresh taste much better when they are frozen. Basil is a special case—it dries well but also freezes beautifully.
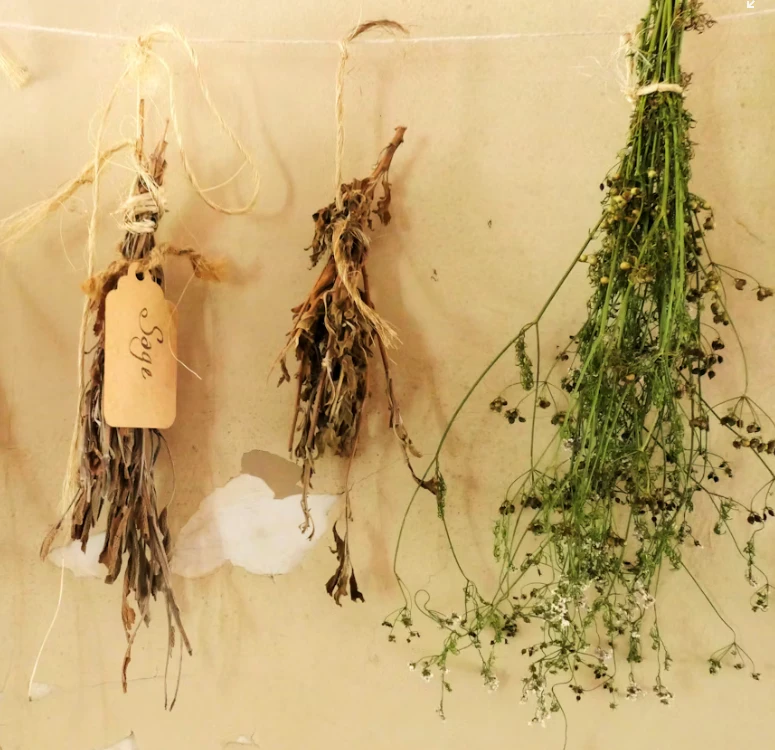
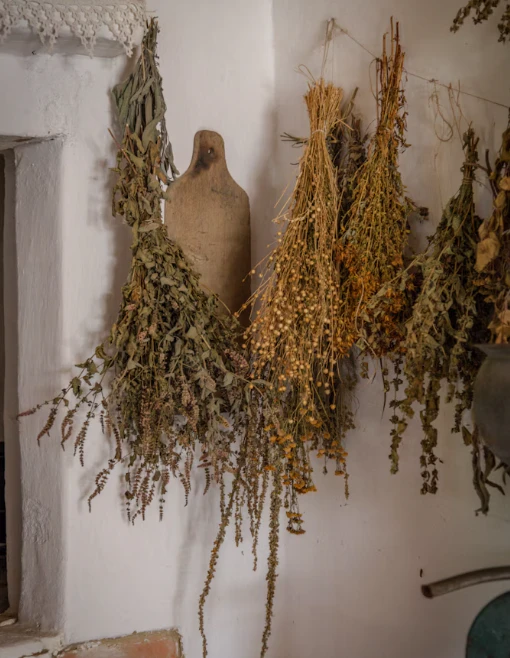
The Classic Method I Love Most: Simple Air-Drying
This is my favorite way to dry herbs. It's completely free, and it makes my kitchen smell like an Italian countryside for weeks. It’s a slow, gentle process that yields fantastic results.
- Step 1: The Morning Harvest. I always harvest my herbs in the morning, right after the dew has dried but before the hot sun has started to bake them. At this time, their essential oils are most concentrated.
- Step 2: Prep and Bundle. I give the herbs a gentle rinse and pat them completely dry with a clean towel. Then, I gather them into small, loose bundles—about the thickness of my thumb. Securing them with a piece of twine or a rubber band is perfect.
- Step 3: Hang Them Up. Find a spot in your home that is warm, dry, and has good air circulation, but is out of direct sunlight (sunlight will bleach the color and flavor from your herbs). A kitchen, a dry pantry, or an attic are all great spots. I simply hang my bundles upside down from a rack or a string.
- Step 4: The Patience Game. Now, you just wait. Depending on the humidity, it can take anywhere from one to three weeks for them to dry completely.
- Step 5: How to Know When They're Ready. You'll know they're done when the leaves are crisp and crumble easily between your fingers. If the stem bends instead of snaps, they need more time.
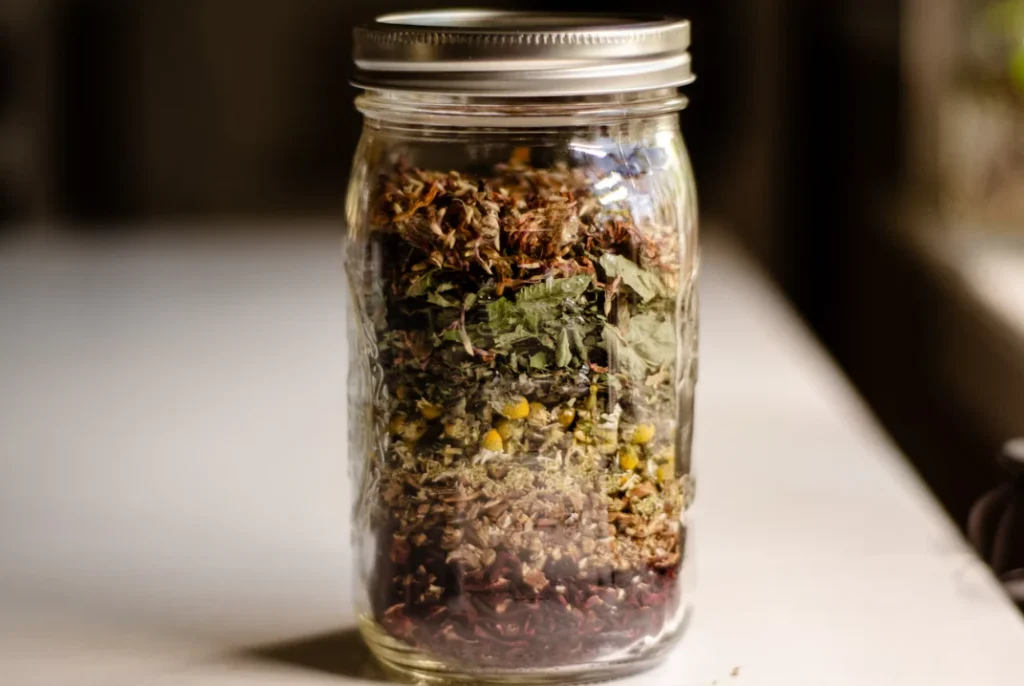
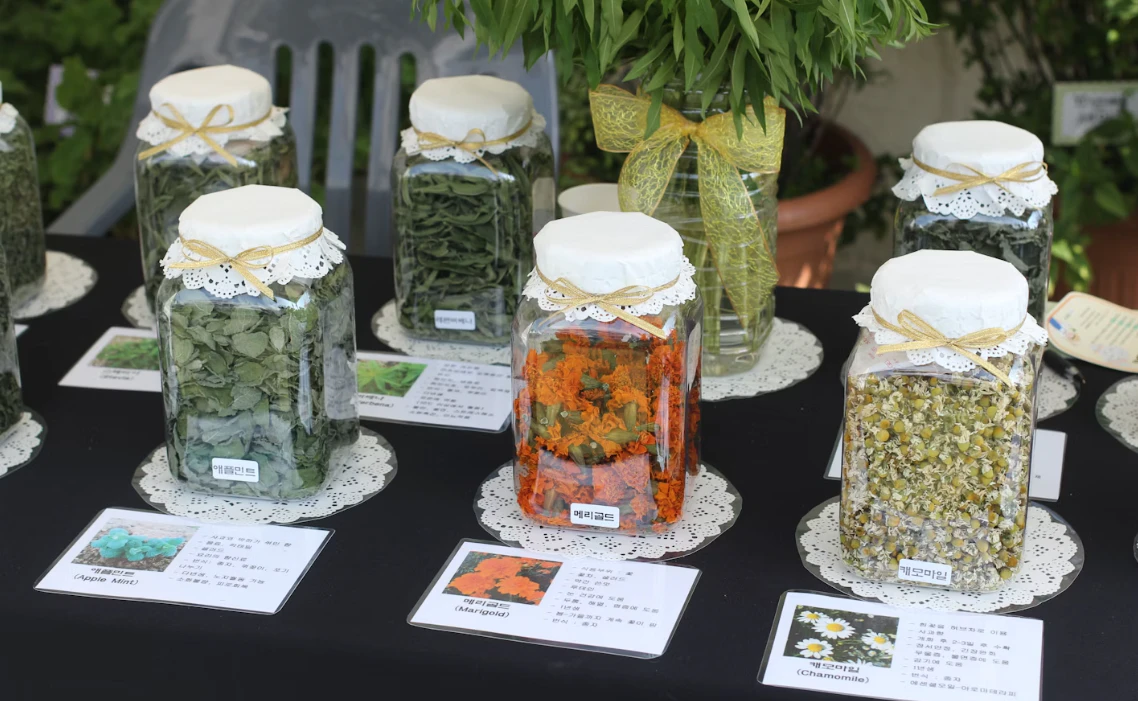
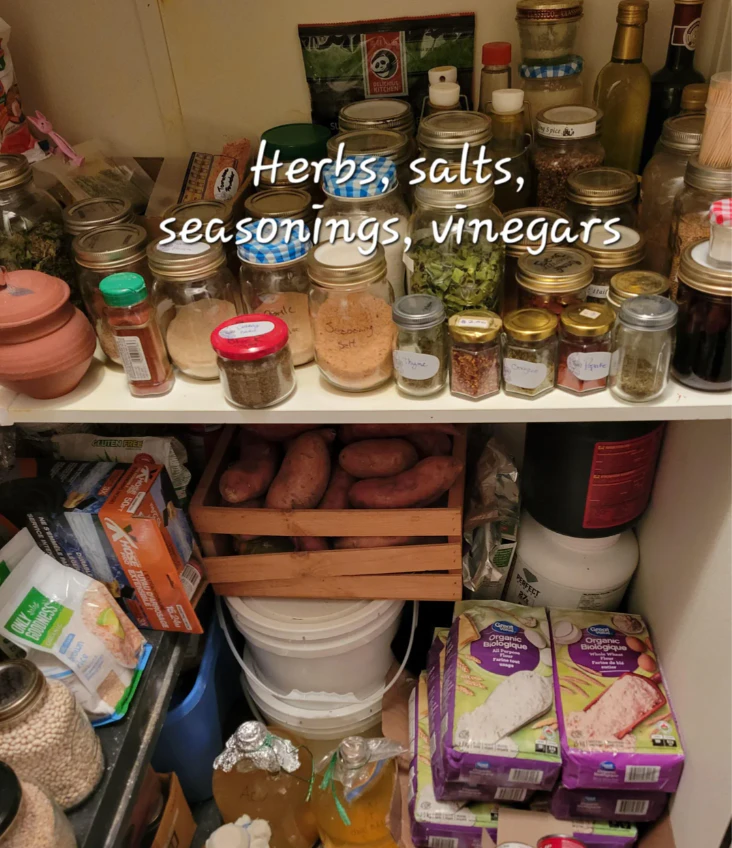
- Step 6: Storing Your Treasure. Once they are perfectly dry, I gently strip the leaves from the stems and store them in airtight glass jars. My pro-tip: store the leaves whole and only crush them right before you use them. This keeps the flavor incredibly fresh and potent for up to a year.
When You're in a Hurry: Two Faster Drying Methods
If you don't have the space or patience for air-drying, you have other options.
- Using Your Oven: Spread the herbs in a single layer on a baking sheet. Set your oven to its absolute lowest temperature (usually around 180°F / 80°C or lower), prop the door open slightly to allow moisture to escape, and check on them every 20-30 minutes. They can dry in 1-2 hours but can also burn easily, so watch them closely!
- Using a Dehydrator: If you own a food dehydrator, it’s the most efficient and reliable method. Just follow the manufacturer's instructions, usually at a low temperature setting (around 95°F / 35°C) for a few hours.
Part 2: Freezing Vegetables – How to Lock in Peak Garden Freshness
Freezing is my go-to method for preserving most of my vegetable harvest. It’s fast, easy, and does an amazing job of locking in the nutrients, color, and texture of freshly picked produce.
The One Step I Beg You Not to Skip: Blanching
Okay, I need you to listen to me carefully. I'm about to share the single most important secret to successfully freezing vegetables, and it's a step that many beginners skip. It’s a process called blanching.
I learned this the hard way. My first batch of frozen green beans which I had so proudly harvested came out of the freezer months later as a bag of mushy, brownish, and completely tasteless pods. It was so disappointing. My mistake? I didn't blanch them.
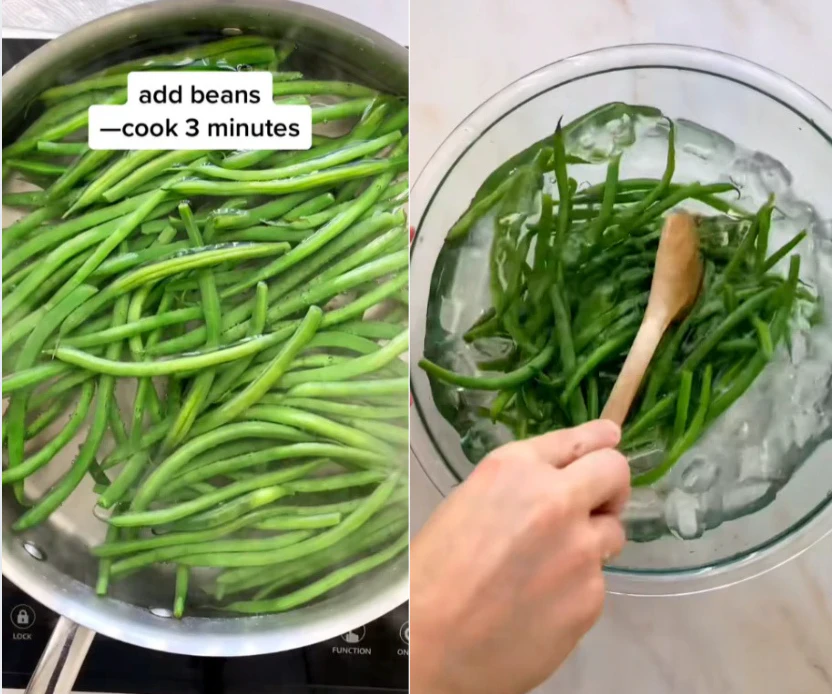
- What is Blanching? It's a very simple process: you briefly cook your vegetables in boiling water, and then immediately plunge them into ice-cold water to stop the cooking process.
- Why You MUST Do It: Fresh vegetables contain enzymes that, even in the freezer, will slowly continue to break down the vegetable, causing it to lose its color, texture, flavor, and nutrients. Blanching stops these enzymes in their tracks, preserving your vegetables in a state of suspended animation.
My Foolproof Guide to Freezing (Almost) Anything
This simple, step-by-step process works for most of the easy vegetables you'll grow in your garden.
- Step 1: Wash, Chop, and Prepare. Get all your vegetables ready. Wash them thoroughly, trim off any tough ends (like on green beans), and chop them into the size you’ll want to use for cooking later.
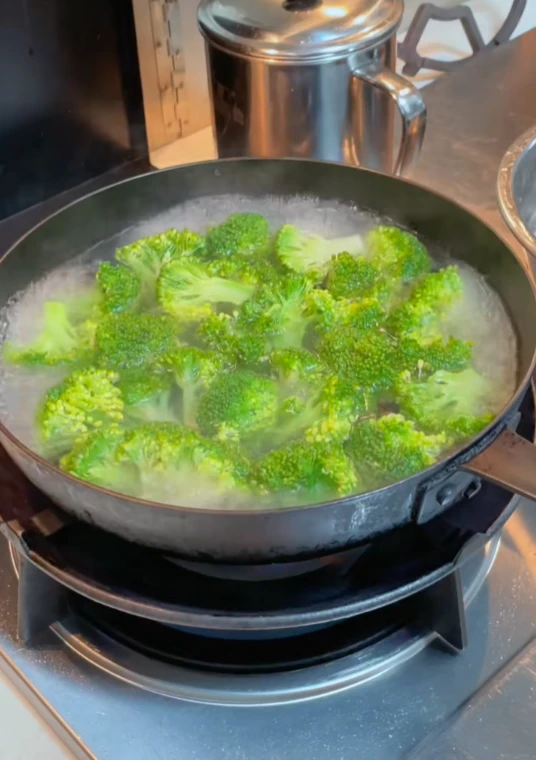
- Step 2: The Quick Boil (The Blanch). Bring a large pot of water to a rolling boil. Drop your prepared vegetables into the boiling water. Don't overcrowd the pot. The clock starts as soon as the water returns to a boil. Each vegetable has a different timing, but here’s a quick guide for common ones:
- Green Beans, Broccoli, Cauliflower Florets: 3 minutes
- Peas, Sliced Carrots: 2 minutes
- Leafy Greens (like Spinach): 1-2 minutes (just until wilted)
- Step 3: The Ice Bath (The Shock). As soon as the timer goes off, use a slotted spoon to immediately transfer the vegetables from the boiling water into a large bowl of ice water. This instantly stops the cooking process and keeps them crisp and colorful. Let them chill for the same amount of time you blanched them.
- Step 4: Dry Them, and I Mean Really Dry Them. This step is absolutely critical. After their ice bath, your vegetables need to be as dry as possible. Any excess water left on them will turn into ice crystals in the freezer, which is the main cause of "freezer burn" and a mushy texture when they thaw.
- My Method: For leafy greens like spinach, a salad spinner is your best friend. For larger vegetables like green beans or broccoli florets, I lay them out in a single layer on a clean kitchen towel or paper towels and gently pat them dry.
- Step 5: The Secret to No More Frozen Bricks: Flash Freezing. My first attempt at freezing was a disaster. I proudly blanched my green beans, stuffed them into a freezer bag, and months later, I pulled out a giant, unusable, frozen brick! The "flash freezing" technique solves this problem completely.
- How to Do It: Spread your dry, blanched vegetables in a single layer on a baking sheet or a large tray. Make sure the pieces aren't touching.
- Place the tray flat in your freezer for 1-2 hours, or until each piece is individually frozen solid.
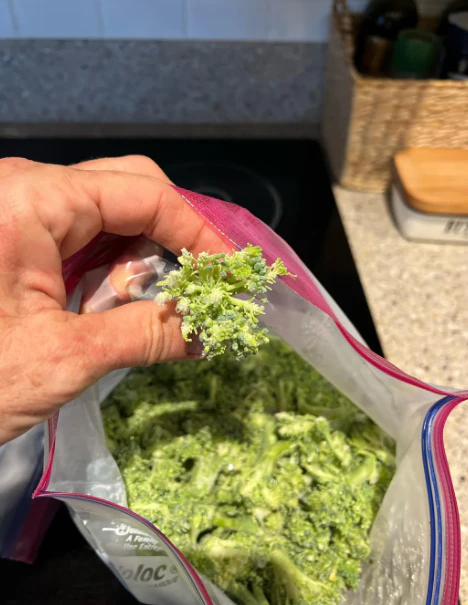
- Step 6: Package, Label, and Store for Winter. Once the vegetables are individually frozen, you can now transfer them from the baking sheet into a freezer-safe bag or container.
- My Final Tips: Squeeze as much air out of the bag as possible to prevent freezer burn (using a straw to suck out the last bit of air is a great hack!). Always label the bag with the name of the vegetable and the date you froze it. Most blanched vegetables will last beautifully in the freezer for 8-12 months.
My Favorite Vegetables That Freeze Beautifully
While many things can be frozen, a few vegetables are particularly well-suited for this method. My personal go-to list includes:
- Green Beans: Perfect for adding to winter stews and casseroles.
- Broccoli and Cauliflower: So much better than store-bought frozen versions. They hold their texture wonderfully.
- Peas: Frozen homegrown peas are like little green jewels of sweetness.
- Corn: I blanch corn on the cob, then slice the kernels off to freeze. The flavor is incredible.
- Spinach and other Leafy Greens: Perfect for tossing into smoothies, soups, or pasta dishes.
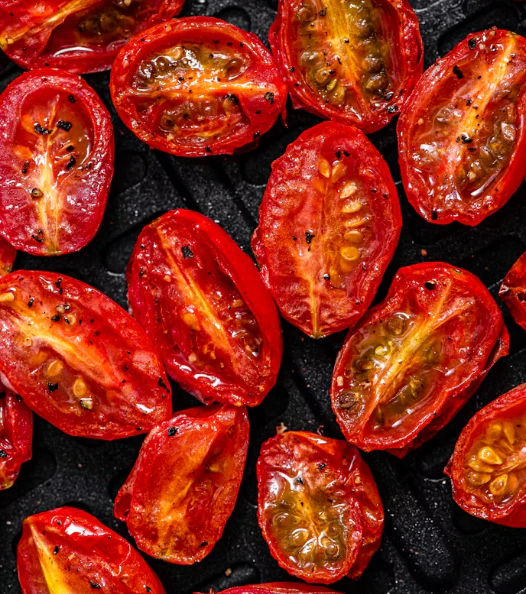
A Special Note on the Summer Superstars: Tomatoes & Peppers
You might have noticed I didn't include tomatoes and peppers in the blanching list. That's because these two garden heroes have their own, even easier, set of rules!
My Easiest Tomato Trick (No Blanching Required!)
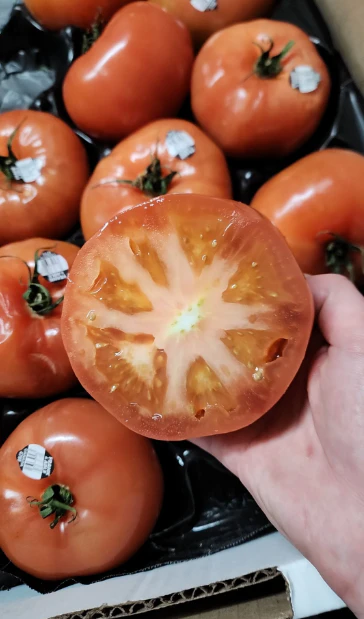
The absolute easiest way to preserve a glut of tomatoes is to freeze them whole. Yes, it's that simple! I just wash and dry them, remove the core, and place them whole in a freezer bag. When you thaw them, the skins slip off effortlessly. They won't be good for fresh salads, but they are absolutely perfect for making rich, flavorful pasta sauces, soups, and stews in the dead of winter.
The Pepper Exception
Bell peppers and hot peppers are one of the rare exceptions to the blanching rule. Their low water content means they freeze beautifully without it. I simply wash them, chop them up (removing the seeds), and flash freeze them on a tray before bagging them. They maintain their color and flavor wonderfully.
One More Fun Idea: Herb-Infused Ice Cubes
This is my favorite way to combine the worlds of herbs and freezing, and it's perfect for those delicate herbs that don't dry as well, like basil, parsley, and cilantro.
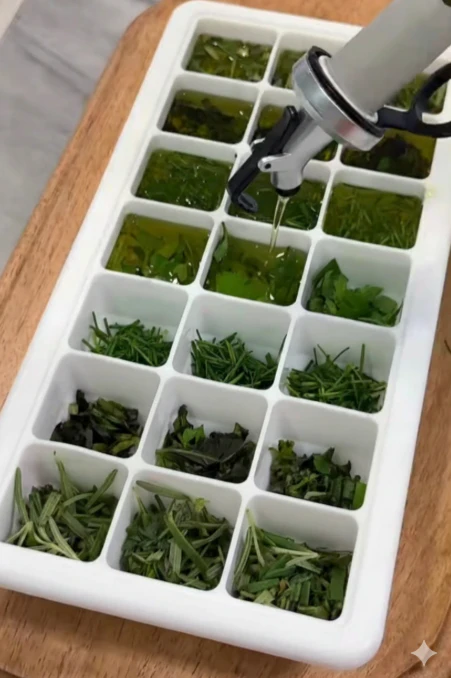
- How to Do It: Finely chop your fresh herbs and pack them into an ice cube tray. Top them off with a good quality olive oil or melted butter and freeze until solid.
- How to Use Them: When you're making a winter soup, stew, or sauce, just pop one of these flavor bombs directly into the hot pan. It’s an instant burst of fresh, summer herb flavor.
Conclusion: A Taste of Summer on a Winter Day
Preserving your own harvest isn't some complicated, old-fashioned chore. It's a simple, beautiful way to honor the hard work you put into your garden and to reduce waste. It’s the final, rewarding step in the garden's life cycle.
And when you're in the middle of a cold, gray winter evening and you open your freezer to pull out a bag of your own vibrant green beans, you're not just adding a vegetable to your meal. You’re adding the memory of your garden, the taste of your hard work, and a small, delicious piece of summer sunshine.
You don't have to preserve everything. Just start with one small bundle of herbs or one handful of beans. That single act is the beginning of enjoying the taste of your garden all year long.