Grow Herbs Without Soil! A Super Simple Hydroponic Mason Jar Herb Garden DIY
The first time someone told me they were raising herbs in dirt… or rather, not in dirt, but rather water, yes, okay. Water No dirt. No mess And that’s exactly what this is.
If you ever had visions of yourself with a lush indoor herb garden in a small contained space, only to dread the idea of potting soil getting all over your counter trust me, been there, then this DIY hydroponic herb garden in a mason jar will blow your mind. It’s inexpensive, tidy, space-efficient, and you’ll be some kind of garden genius.
Trust me if I can successfully grow basil from only water and sunlight, it’s an easy task.
- What the Heck Is Hydroponics Anyway?
- Why Mason Jars? Because They’re Freaking Perfect.
- My First Adventure (or, The Basil Plant Which Wouldn't Die!)
- What You’ll Need (Don’t Worry, It’s Minimal)
- Step-by-Step: Creating My Hydroponic Herb Garden Using Mason Jars
- The Science Behind It (Without the Boring Part)
- Common Mistakes I Made (So You Don’t Have To)
- My Personal Setup (Since I’m a Nut About Efficiency)
- The Joy of Watching Roots Grow (Don’t Judge Me)
- The Taste Test: Hydroponic vs. Soil-Grown Herbs
- A Few Creative Twists to Try
- The Eco Perks Nobody Talks About
- Budget Breakdown (Since We Love Transparency)
- What I Learned (And Why I’ll Never Go Back To Soil Again) Alternatively |Soil|The Soil
- My Favorite Part: The Morning Ritual
- Final Thoughts: My Tiny, Mess-Free Slice of Green Heaven
What the Heck Is Hydroponics Anyway?
Keep it simple. Hydroponics essentially means plants grown in water rather than soil. The nutrients from this water provide the plants’ sustenance. The roots of the plants drink their dinner right from the mixture.
It’s how modern farms grow lettuce in giant warehouses. It’s how NASA plans on growing food in space (yes, seriously). And it’s exactly what we need if we’re going to successfully grow herbs in our kitchen.
So yeah, think of hydroponics as the lazy gardener’s dream: no dirt, no bugs (like those annoying fungus gnats!), no overwatering disasters just fresh herbs growing in pretty glass jars.
Why Mason Jars? Because They’re Freaking Perfect.
You could potentially raise hydroponic herbs in any container that can hold water, but mason jars are the MVPs of indoor gardening. Trust us, here’s why:
- They’re inexpensive. They’re readily available. You no doubt have a few of them stashed away from your jam-making tadpole period in life.
- The design of BES-C. Herbs packed in glass jars with roots exposed? Total Pinterest moment.
- They’re reusable. You can plant, harvest, wash, and start all over again using the same jars.
- They fit perfectly on a windowsill. Even if your “garden” is merely the three inches of space found behind your kitchen sink, you’re all set.
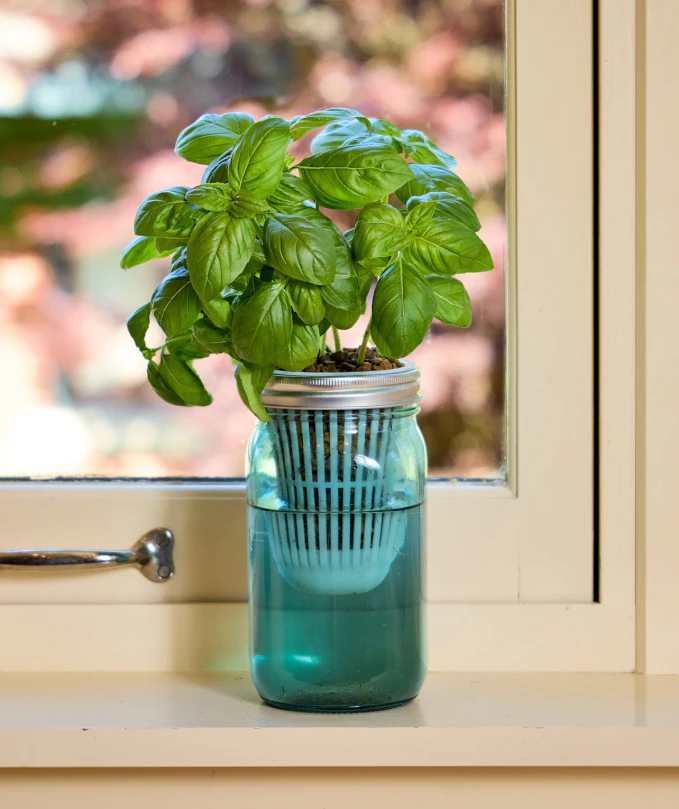
My First Adventure (or, The Basil Plant Which Wouldn’t Die!)
The first herbaceous plant I decided to attempt was basil, which, by me, will forgive all sins. I mean, I didn’t actually know what I was doing. Pick a random jar. Fill it with tap water. Plop a cutting in it. Hope it’s magically filled with nutrients.
Guess what? It grew.
Successfully, not just existing. A week later, there were tiny white roots twisting like mad, and by week two, leaves galore for pasta dinner.
Perfect? No. My kitchen smelled like a swamp for two days because I didn’t switch the water. Oops. Guess that’s how you learn, a common theme in my beginner gardening mistakes.
What You’ll Need (Don’t Worry, It’s Minimal)
Prepared to create your own hydroponic herb garden using mason jars? Here’s your shopping list:
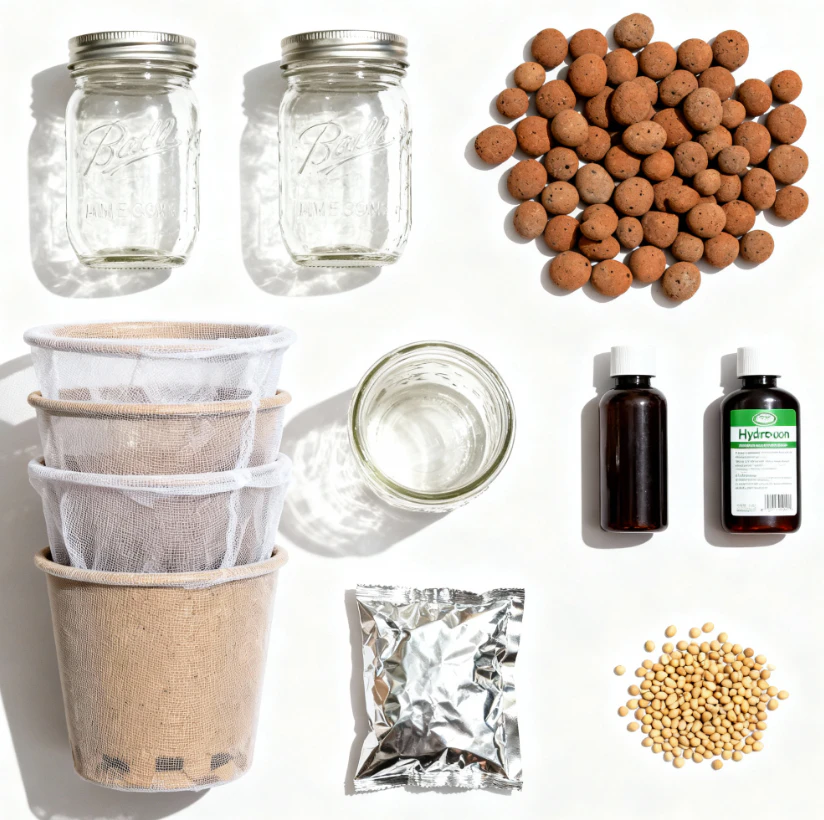
Supplies:
- Mason jars (any size will do, preferably 16 oz)
- Hydroponic nutrient solution (you can purchase this from an online site or garden store)
- Net pots or mesh inserts (optional but useful)
- Clay pebbles or perlite (as supporting plant matter)
- Fresh herb cuttings or seeds
- Aluminum Foil or Craft Paper (for jar wrapping)
- Water (filtered or bottled is best)
- Ade
That’s it. No elaborate grow tents or pumps or science lab equipment. Just jars, herbs, and grooviness.
Step-by-Step: Creating My Hydroponic Herb Garden Using Mason Jars
Alright, moving on to the exciting stuff. This is the third time I’ve done this, so this is how it’s done.
Step 1: Pick Your Herbs Like You’re Casting a Reality Show
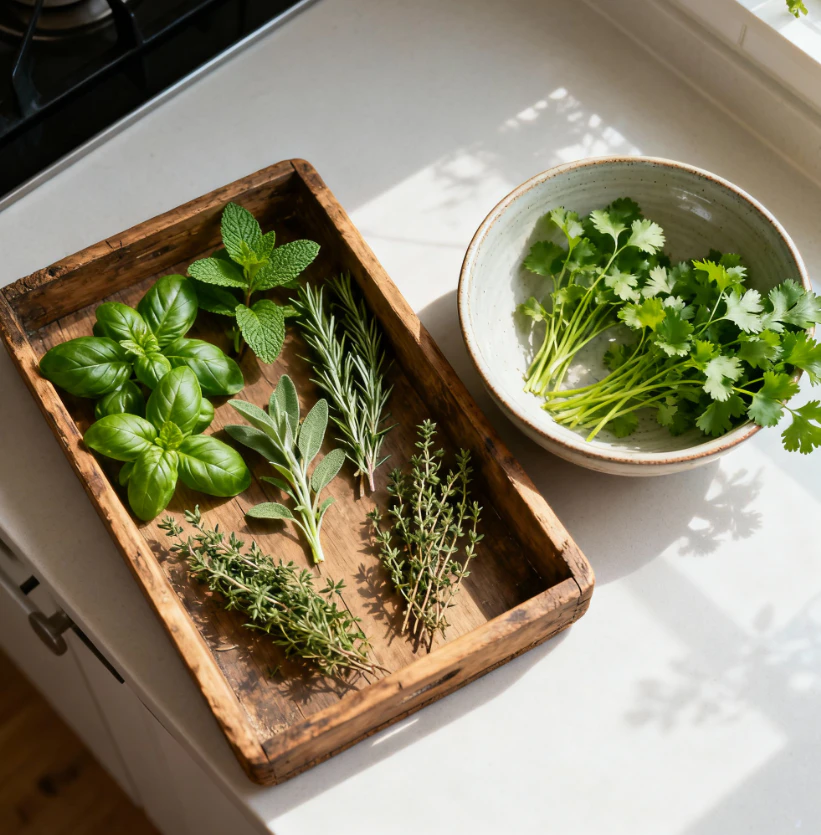
Not all herbs like growing in the water, of course. Many do, though. My favorites are:
- Basil – This grows like a pro and smells amazing
- Mint – it spreads quickly, ideal for mojitos
- Oregano – thrives indoors
- Thyme – Slow but Steady Thyme
- Parsley: a small diva, though not difficult overall
- Cilantro – it likes cooler spots
Avoid rosemary, it’s so dramatic and doesn’t like wet weather. (Sorry, rosemary lovers.)
Step 2: Prep the Jars
Wash your mason jars as if they will go into surgery. Leftover residue or soap can interfere with the roots’ effect.
@theporchpotager1 Garden Tip. Turn mason jars into a thriving indoor garden. #gardentips #gardentok #containergarden #hydroponics #fypシ ♬ Reflection on Peace – Adauto Assis
Then cover the outside of each jar with aluminum foil or dark paper.
Why? Roots dislike light. If light reaches the water, algae begins a pool party. The jars will stay dark and clean.
Tip from a pro: Now, black electrical tape in a zigzag pattern. I did this once, and it was great.
Step 3: Mix Your Nutrient Solution
The first. It’s where you feel like a mad scientist (but in a good, wholesome way).
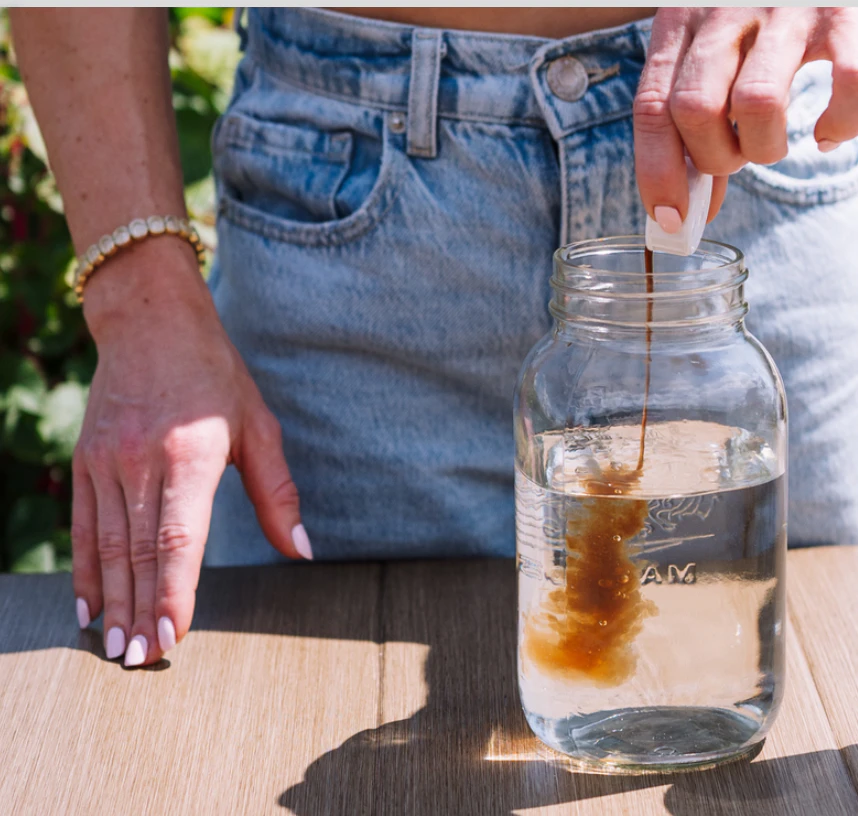
Follow the instructions on the hydroponic nutrients. Typically, this involves mixing a small amount of it with the water. Don’t overdo it. Your herbs don’t need a bath of chemicals.
For fertilizing, I use a general hydroponics solution that’s well balanced for leafy crops, though. It’s working wonderfully.
Step 4: Set Up the Cuttings or Seeds
If you’re rooting from cuttings, take a non-stem node (where the roots will appear from the cutting), snip your healthy stem there, then absorb all the leaves below the node. Stick it in the jar with the node submerged.
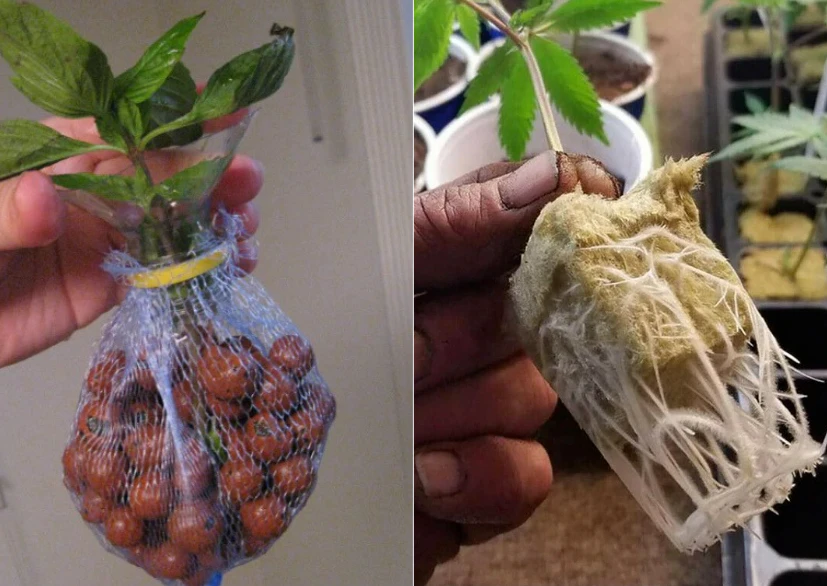
If you’re beginning with seeds, put them into a small net pot filled with a little perlite or clay pebbles. Put in enough water to touch the bottom of the perlite or clay pebbles.
And yes, of course, I’ve done both. Cuttings will produce faster growth. However, sprouts offer a great boast.
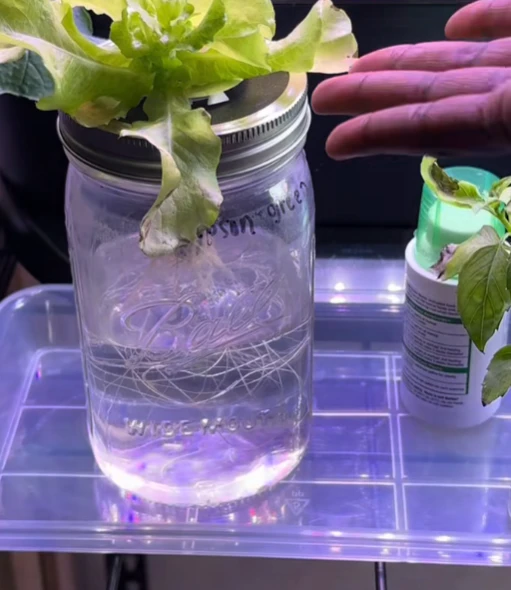
Step 5: Give Them Light (But Not a Sunburn)
Though it’s hard. Put your jars in a location that receives indirect sunlight from 5-6 hours a day. A sunny windowsill is ideal.
If your kitchen is more of a “cave chic” than a “sunny sanctuary,” pick up an LED grow light. Mine ran me about $20, and it was a huge help. Using lights is a key part of starting an indoor garden.
Do not forget, herbs need sunlight but not sunlight’s heat. If it gets hot sunlight through the window, move the containers a little backward.
Step 6: Water Maintenance (aka: Don’t Let It Smell Weird)
Water’s Role. Each week, it’s necessary to update the water in the jar. Seriously, don’t forget this step or you’ll regret it.
I did that one time, and the mint smelled like stinky old fish.
Each time you change the water:
- Rinse the roots gently
- Add fresh nutrient solution.
- Check For Algae/Slime (remove it if you find it there)
It’s a five-minute task, and your plants will reward you.
The Science Behind It (Without the Boring Part)
Have you ever wondered how herbs can actually grow in planters with no soil? The best part? Soil is merely a vector of nutrients. Roots don’t “require” soil. Roots require oxygen, hydration, and minerals.
Hydroponics bypasses the middleman. The roots receive nutrients directly from water, and owing to the increased availability of oxygen, the roots develop faster.
This is why hydroponics always seems more lush and leafy than herbs grown in soil. Think of it as an all-inclusive resort.
Common Mistakes I Made (So You Don’t Have To)
Let’s face it—I’ve been plenty inept before finding their stride. Here’s a quick rundown of a few of the missteps you can avoid.
- Using tap water directly from the faucet. Chlorine and minerals can inhibit growth. Let it sit overnight or use filtered water.
- Avoiding Algae. If your water looks greenish, your roots are basically sunbathing in slime. Wrap the jar darker.
- Too much nutrient solution. More doesn’t mean better. Overfeeding = root burn.
- Positioning jars near a heating or air conditioning vent. Abrupt changes in temperatures can stress the plants.
- Forgetting to trim. It keeps the herbs healthy by preventing them from becoming leggy.
Each of these-errors cost me a few sad leaves, but hey, that’s gardening. It’s a combination of science and randomness.
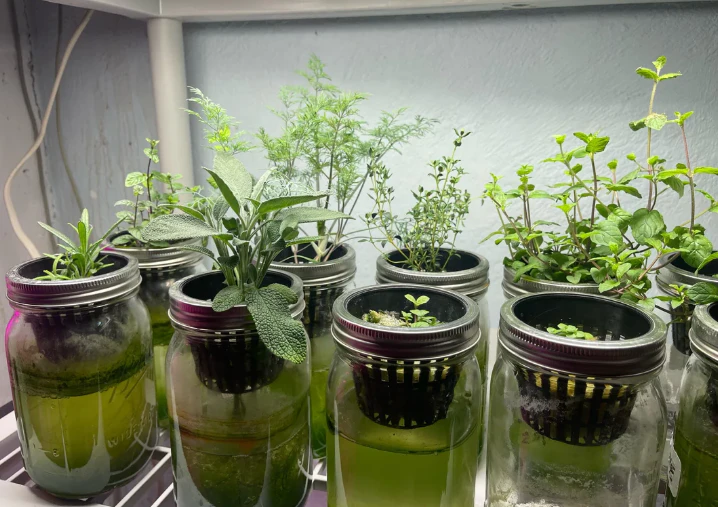
My Personal Setup (Since I’m a Nut About Efficiency)
Here’s how my kitchen arrangement looks now.
There were six mason jars aligned on the windowsill.
- Basil, mint, parsley on one side
- Oregano and Thyme, on the other
Brighted by a $20 LED light.
A small label on each jar so I don’t get cilantro and parsley mixed up. Yeah, so that’s already happened.
It looks totally clean, minimalist, and freakishly aesthetically pleasing. Also, it provides me with fresh herbs on a weekly basis.
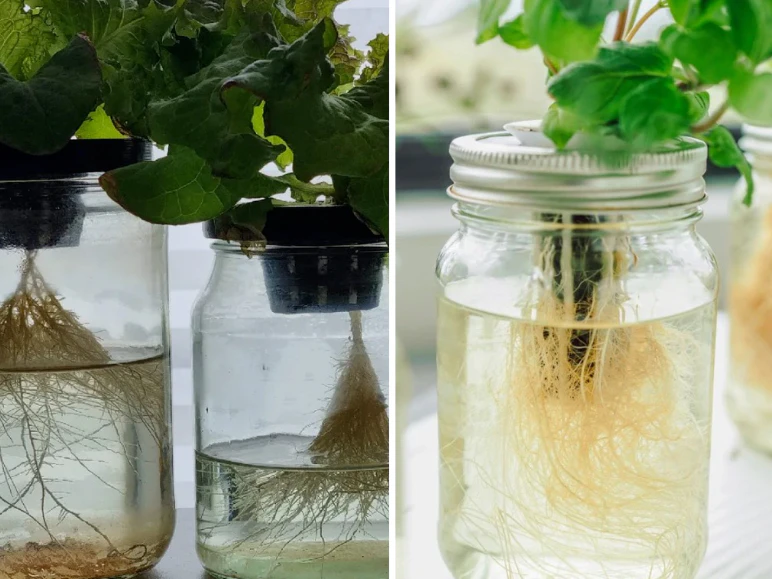
The Joy of Watching Roots Grow (Don’t Judge Me)
Hey, did you ever notice how addicting it can be to watch roots develop in clear water?
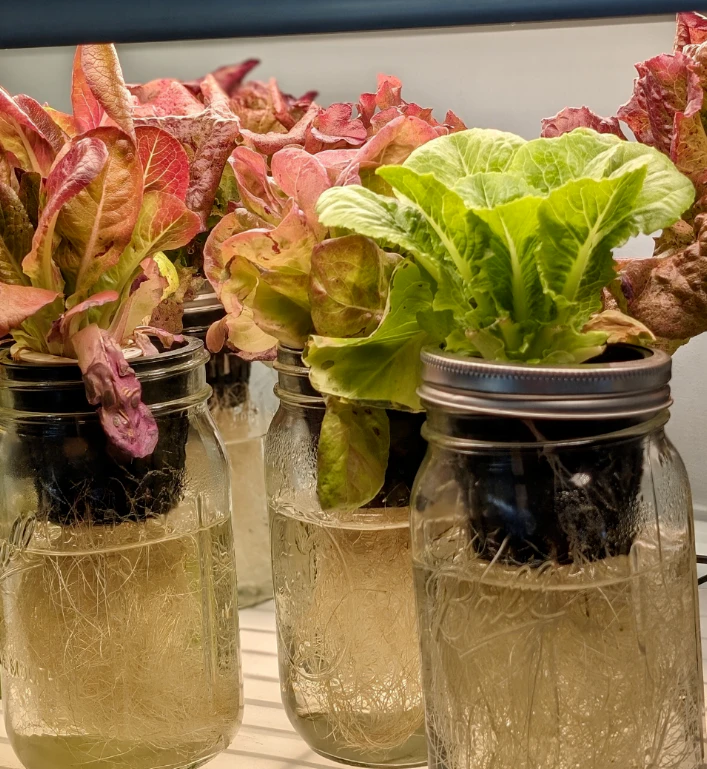
There’s just satisfaction in watching the white roots grow around in the jar, knowing that you created this little world.
Plus, when your friends come visiting and ask, “Wait, aren’t those herbs grown in water?”, you give them your smug self-satisfaction grin and say, “Yep. No dirt. Hydroponics, baby.”
The Taste Test: Hydroponic vs. Soil-Grown Herbs
Alright, so you must be wondering is it the same taste?
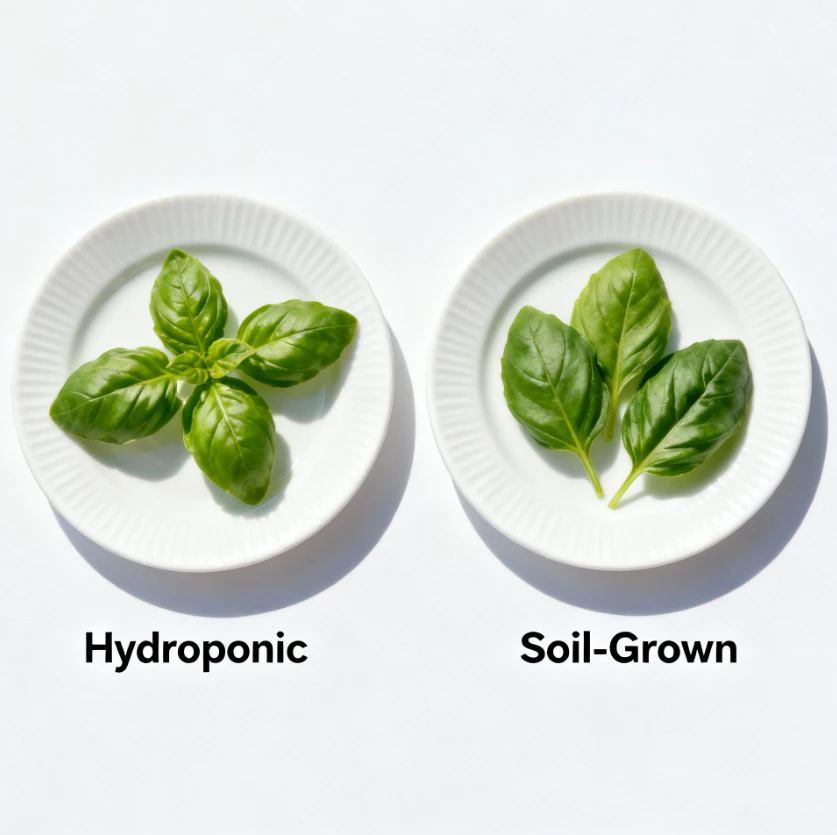
Short answer: yes, with a difference. My hydroponic basil has a cleaner and less intense flavor than the soil-grown basil, which has an earthy taste. Mint? Practically indistinguishable.
Blind taste tests with my friends (because, why not?) showed that most of them had no idea which was which. So, hydroponic herbs totally aced the taste test.
Quick Troubleshooting Guide
- Wilting Leaves? Likely a lack of nutrients or insufficient lighting. Put fresh solution into the jar and move it closer to the window.
- Algae Bloom? Secure your container better or preferably take its contents out. Sun + nutrients = Algae party.
- Brown Roots? Overfed or starved of oxygen. Rinse the roots. Change the water.
- Slow Growth? Check the temperature. Herbs like temperatures of 65-75°F (18-24°C). Temperatures below or above this will slow.
A Few Creative Twists to Try
Now, after you understand the fundamentals, it’s time to enjoy it.
- Paint or decorate your jars. Incorporate chalkboard labels, washi tape, or natural twine for that “Pinterest kitchen” feel.
- Combination of herbs and flowers. You could use marigolds or nasturtiums. They’re edible.
- Gift them! A hydroponic herb in a mason jar is, seriously, the easiest, most adorable DIY ever. Add a tag that says “Water me weekly.” Done.
The Eco Perks Nobody Talks About
Hydroponic herbs don’t just look good—they’re eco-friendly too.
- You consume much less water than in soil gardening.
- Fertilizers not leaching into the soil.
- No disposable plastic pots, aligning with upcycled planter ideas.
- And since every item can be reused, you’re reducing waste.
Moreover, herbs can be grown all year round. (Just imagine how impossible it would be in your garden in Jan!)
Budget Breakdown (Since We Love Transparency)
Actually, there. Here’s roughly what my 6-jar setup cost:
| Item | Cost (USD) |
| 6 Mason jars | $12 |
| Nutrient solution | $15 |
| Clay pebbles | $8 |
| Grow light | $20 |
| Herb Cuttings | Free |
| Total | $55 |
That’s less than a fancy dinner, and now I have herbs for months.
And once you have the setup, the only recurring cost is nutrient refill maybe $10 every few months. Not bad, right?
What I Learned (And Why I’ll Never Go Back To Soil Again) Alternatively |Soil|The Soil
The thing is, gardening is something I enjoy, but not scrubbing dirt off the kitchen counter every morning is something else.
Hydroponic jars give me:
- Fresh herbs year-round
- Zero mess
- Beautiful decor
- Total control over growth
And strangely, it’s ended up making me feel more connected to my plants. You can basically watch the roots breathe, drink, and grow. It’s like you’re right there inside their world.
My Favorite Part: The Morning Ritual
It’s not always. Each morning, I brew a cup of coffee, inspect the jars, and pick some leaves. There’s serenity in that act. The sight of pearl-sized droplets trickling down green stems with sunlight streaming into the glass is almost meditative. Gardening doesn’t always have to mean mud, sweat, and shovels. There can be quiet water, lush growth, and the scent of mint in your tea.
FAQ: Because You’re Probably Wondering
- Q: How long do hydroponic herbs stay fresh?
A: With good care, months! Basil can go 3–4 months, mint even longer. - Q: Can normal fertilizer be used in place of hydroponics nutrients?
A: Not ideal. Normal fertilizers aren’t meant to be totally dissolved by water. Hence, opt for fertilizers that are hydro-specific. - Q: Can they be kept outside during summer?
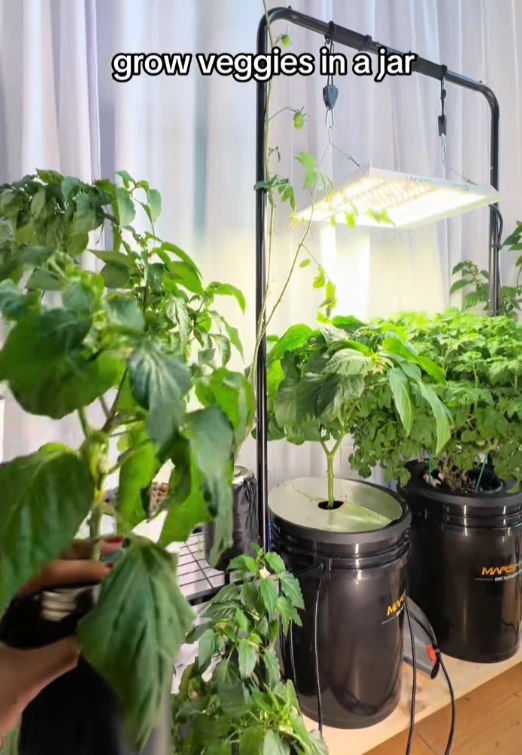
A: Yes, but you do not want to put them in direct sunlight or it will heat the water. - Q: Can I use this method to grow vegetables?
A: Small ones, like lettuce or spinach, yes. Tomatoes would require more sophisticated ones, similar to those mentioned in our indoor vegetable guide.
Final Thoughts: My Tiny, Mess-Free Slice of Green Heaven
If someone told me years ago that I would be able to grow herbs on a shelf in my kitchen without using soil, I would laugh in their face. Now, here we are.
Gardening with hydroponics in mason jars was actually one of the easiest, cleanest, and most rewarding hobbies that I’ve taken up. It’s a low-maintenance, high-reward activity that’s ideal for someone who wants access to herbs but doesn’t feel like becoming best buds with a watering can.
So, take a few jars, some nutrient solution, and get started. Trust me, after you notice that swirl of roots, you’ll be hooked.
And if you ever find yourself chatting up your basil as if it’s a pet (no judgments here he guilty pleasure too), don’t sweat it you’re officially one of us. Welcome to the dirt-free garden club.